In my last post, I walked you through the CompactLogix 5380 hardware platform including its dual-port EtherNet/IP interface, which is what you'll use to connect the controller to a network. Before you can connect to it with Studio 5000 Logix Designer, though, you need to assign it an IP address.
In this post, I'll show you how to do that using the EtherNet/IP Address Commissioning Tool, one of the quickest and most reliable methods for commissioning a new controller on a network.
What Is the EtherNet/IP Address Commissioning Tool?
The EtherNet/IP Address Commissioning Tool listens for BootP and DHCP requests broadcast by devices that don't have a static IP address assigned. When a brand-new controller, or one that's been reset to factory defaults, powers up, it broadcasts one of these requests. The tool detects the request, lets you assign a static IP address to the controller, and can configure the controller to use that address from that point on.
It comes bundled with Studio 5000 and is one of the most straightforward ways to commission a new Logix controller on a network.
Before You Start
Before launching the tool, prepare your PC:
- Disable your PC's firewall, or configure it to allow UDP ports 67 and 68, which are used by the BootP/DHCP protocol.
- Connect your PC directly to the controller with an Ethernet cable, or connect both to the same network switch.
On the controller side, make sure BootP or DHCP is enabled (new controllers have this on by default), apply power, and confirm the Ethernet link LED is active. Finally, locate the MAC address label on the side of the controller. You'll use the MAC address to verify the device in the next steps.
Set the IP Address of Your Computer
Before configuring the IP address of the PLC, assign a static IP address to your computer that's on the same network as the address you'll assign to the PLC.
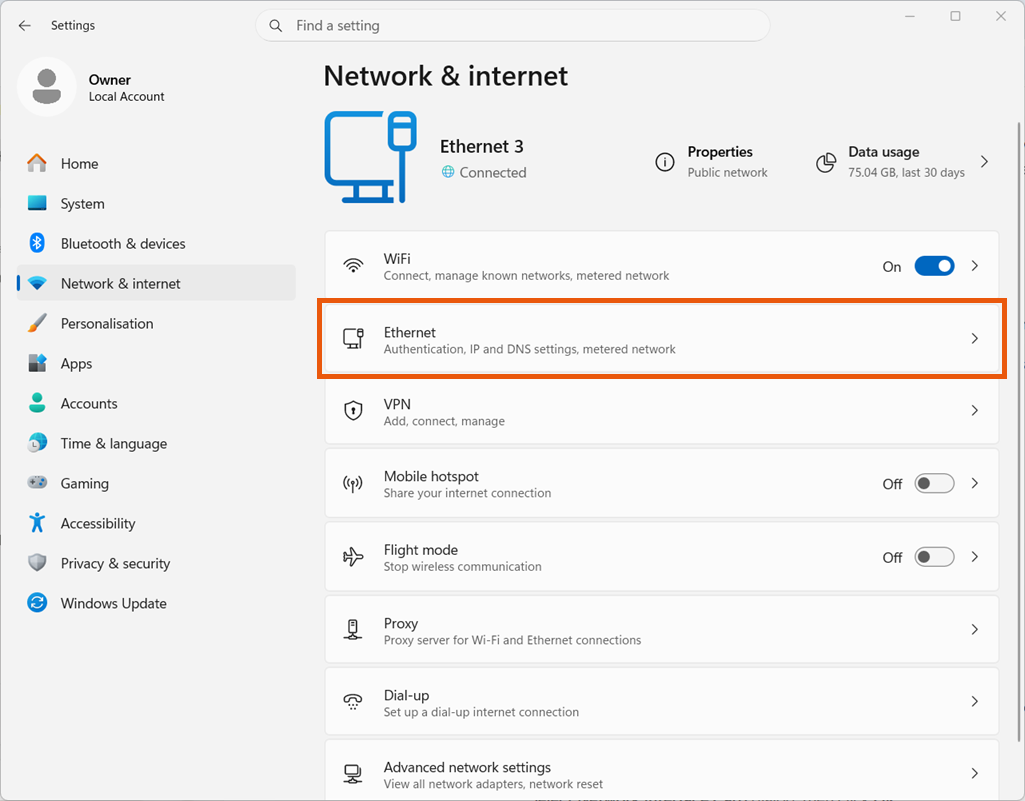
Right-click on the network adapter icon in your taskbar and select Network and Internet Settings.
.png)
On the screen that opens, select Ethernet.
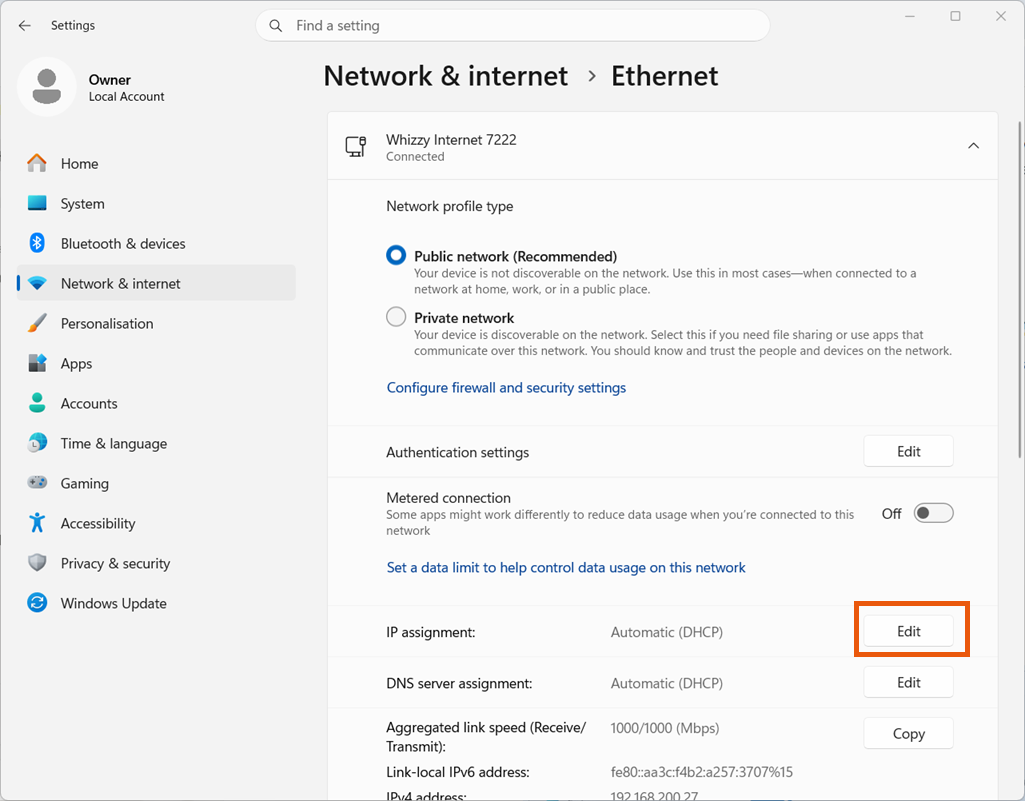
Click Edit on the IP Address Assignment field.
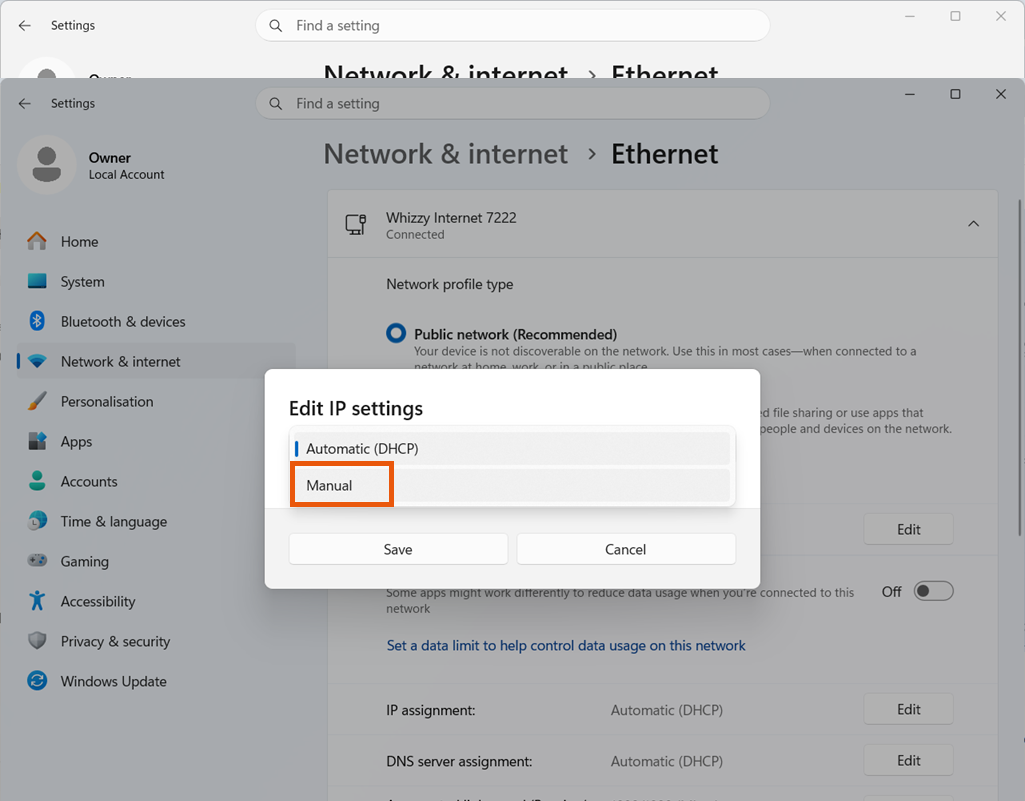
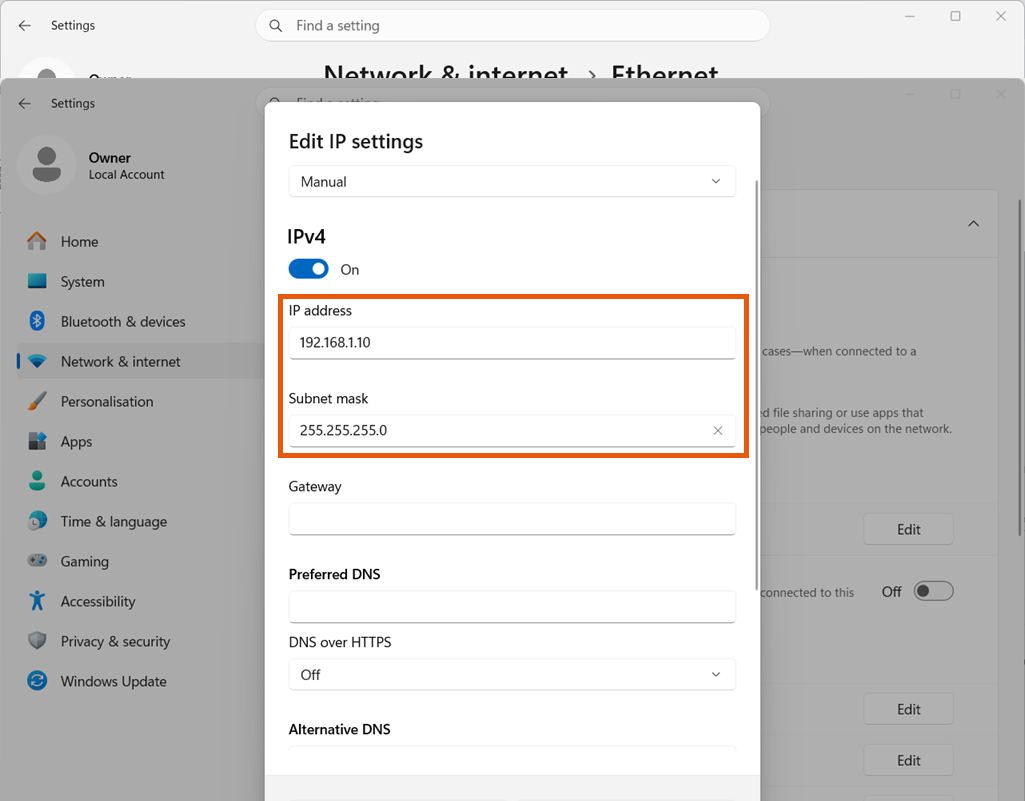
Select Manual in the Edit IP Settings dropdown.
Toggle the IPv4 switch On.
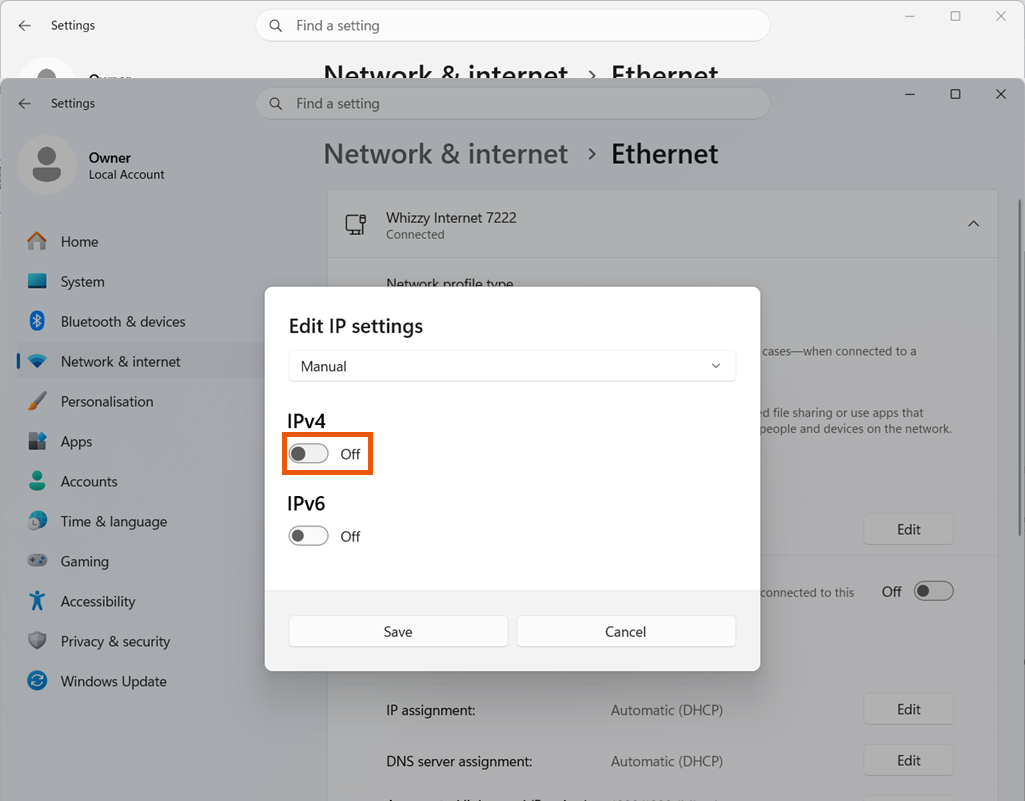
Enter an IP Address and Subnet Mask for your computer. In industrial automation, it's common to use the 192.168.1.X range with a Subnet Mask of 255.255.255.0.
Assigning the IP Address
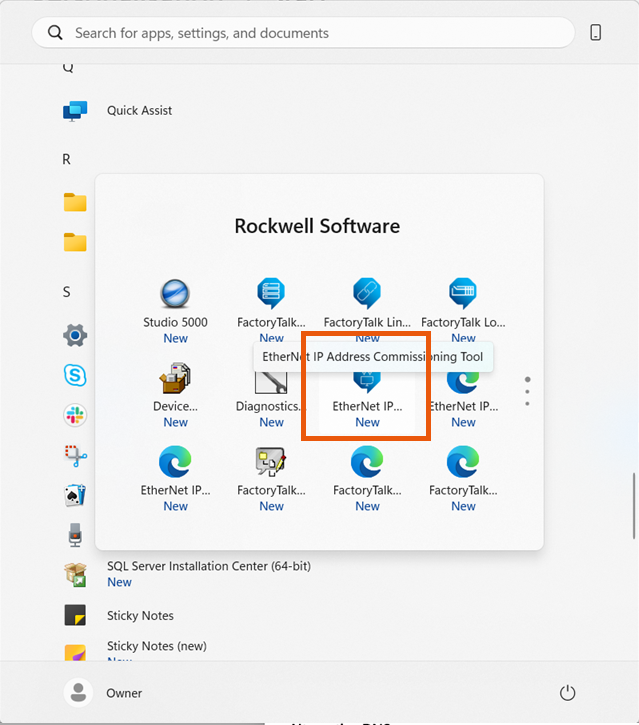
Launch the EtherNet/IP Address Commissioning Tool from Start > All Programs > Rockwell Software > EtherNet IP Address Commissioning Tool.
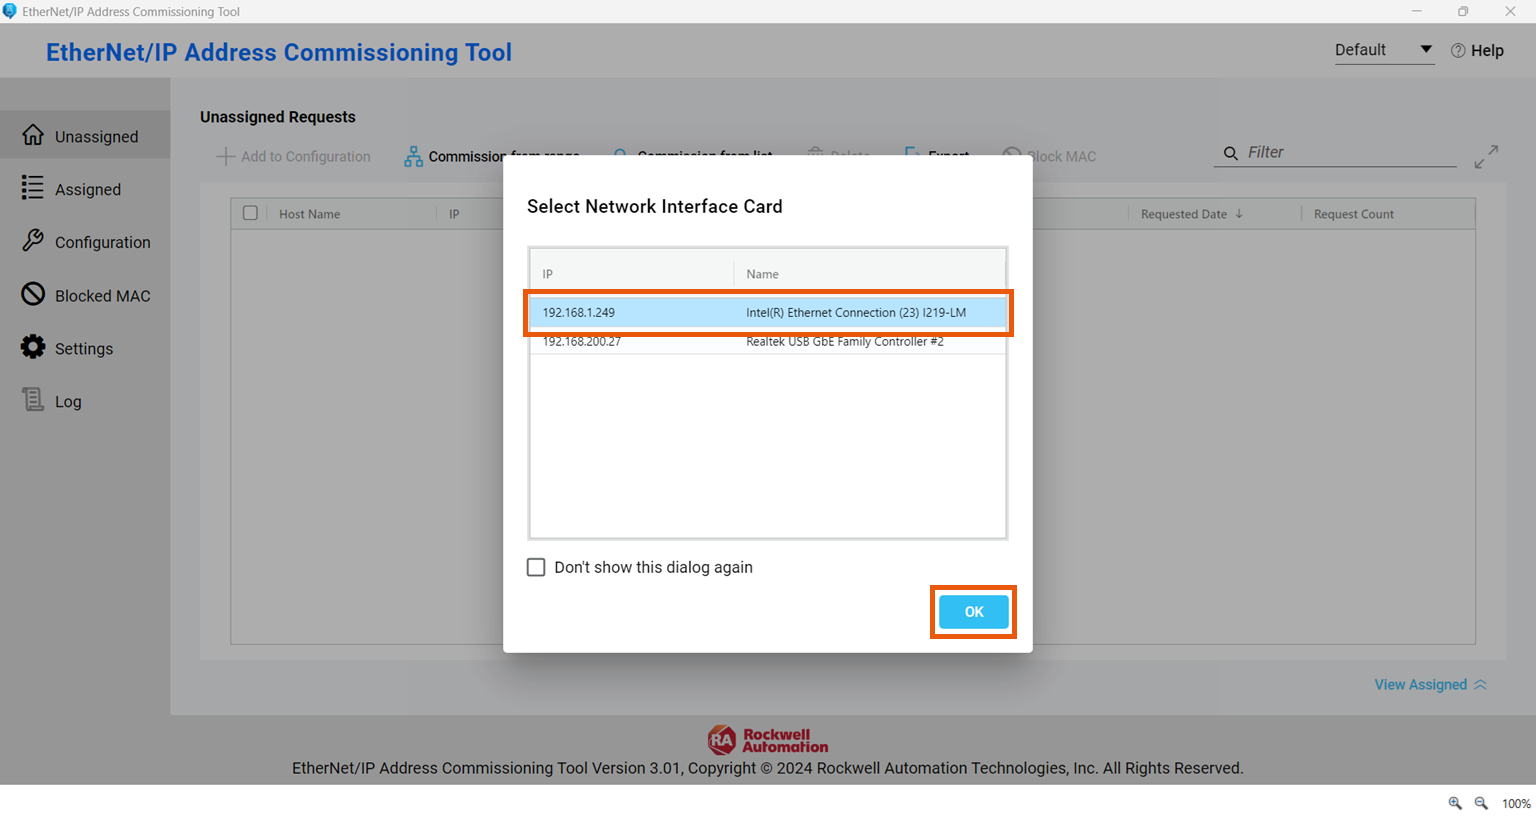
On launch, select the network interface card (NIC) connected to the controller from the Select Network Interface Card dialog, then click OK.
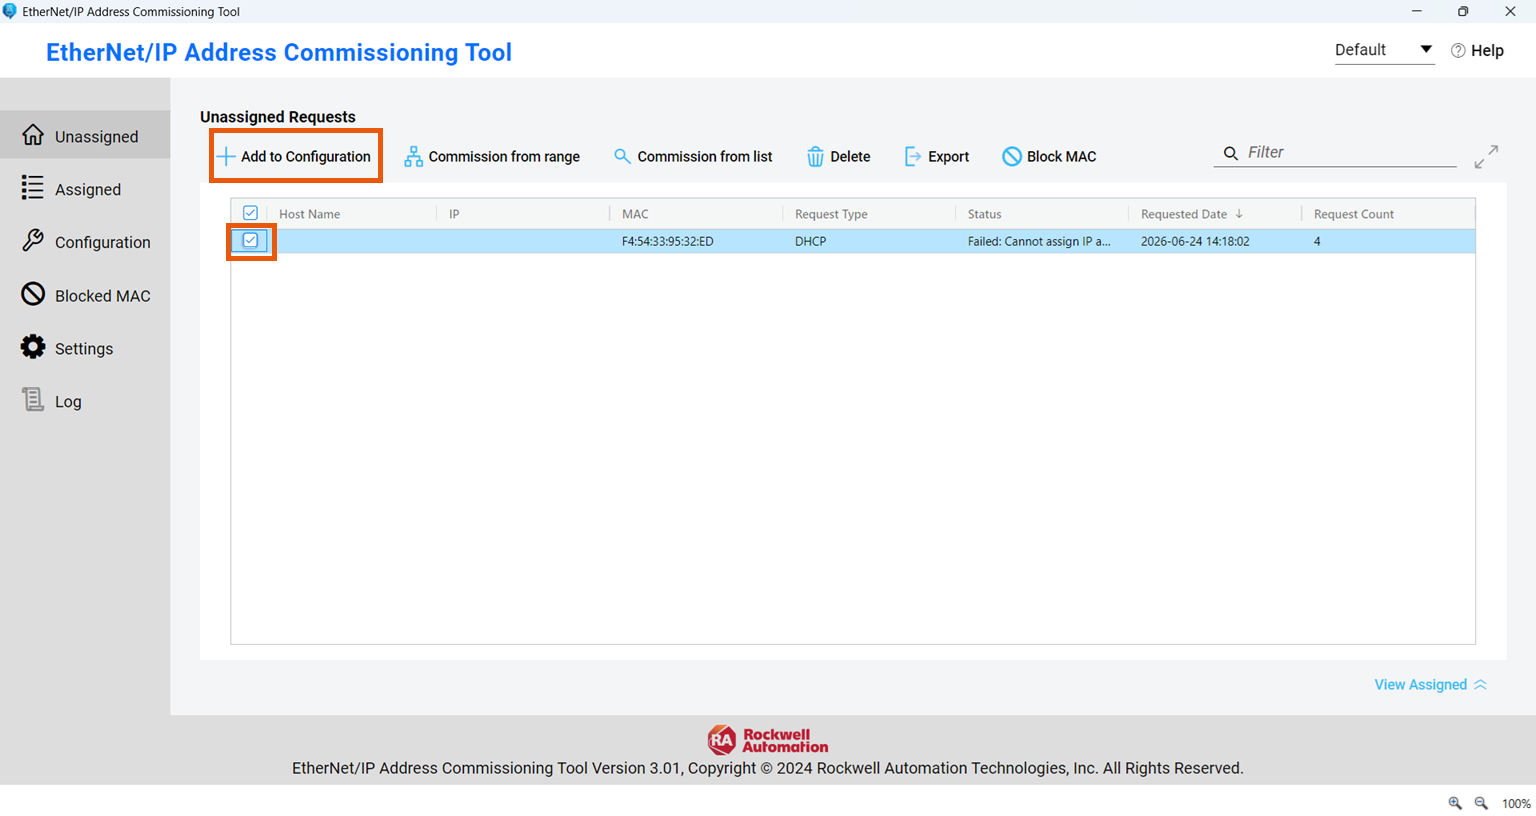
The Unassigned tab displays the MAC address of any device broadcasting a BootP or DHCP request.
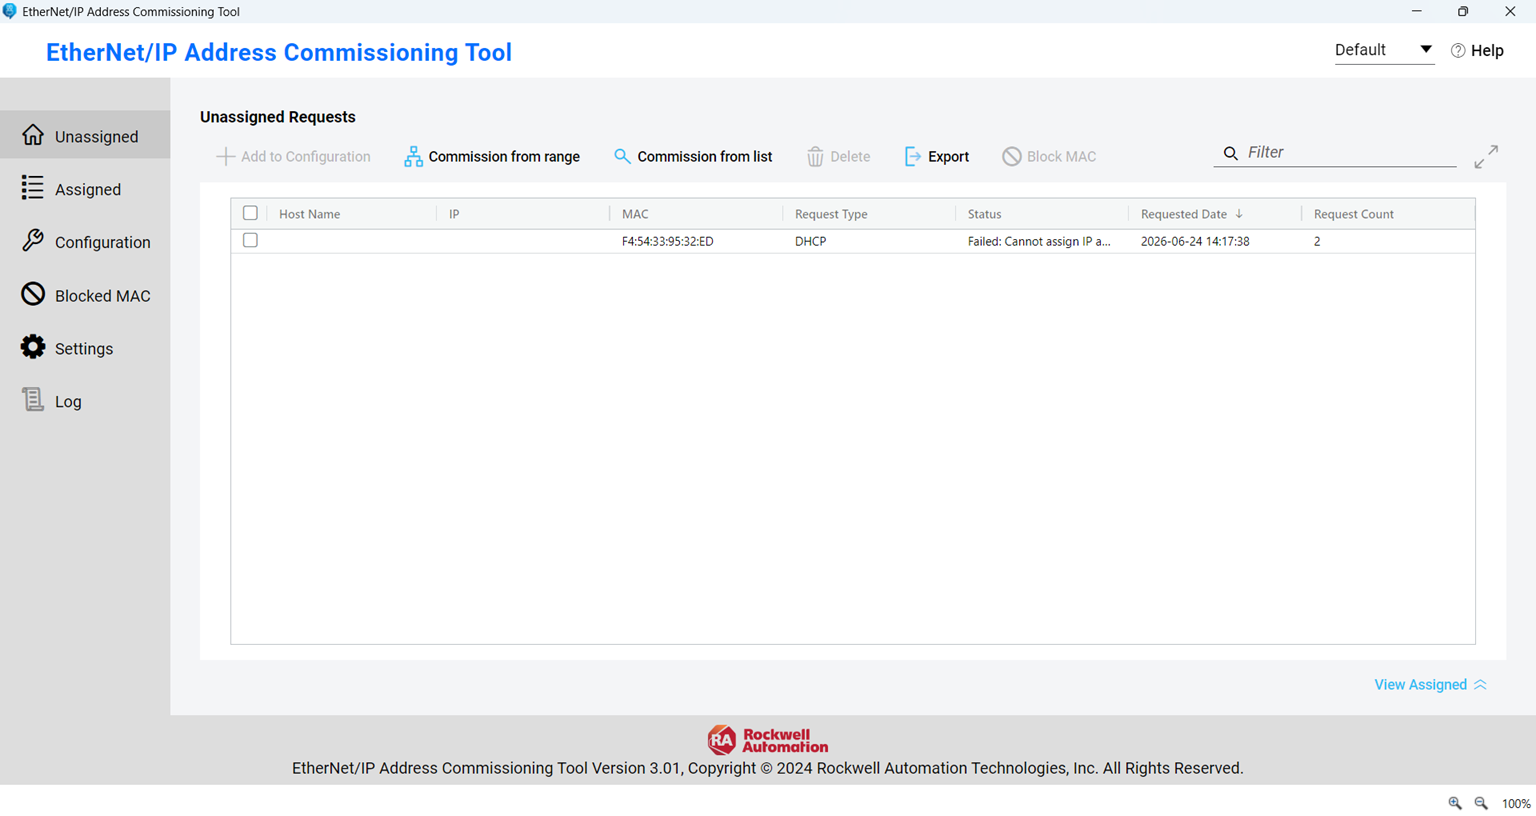
Verify the MAC address matches the label on your controller. Check the box next to it and click Add to Configuration.
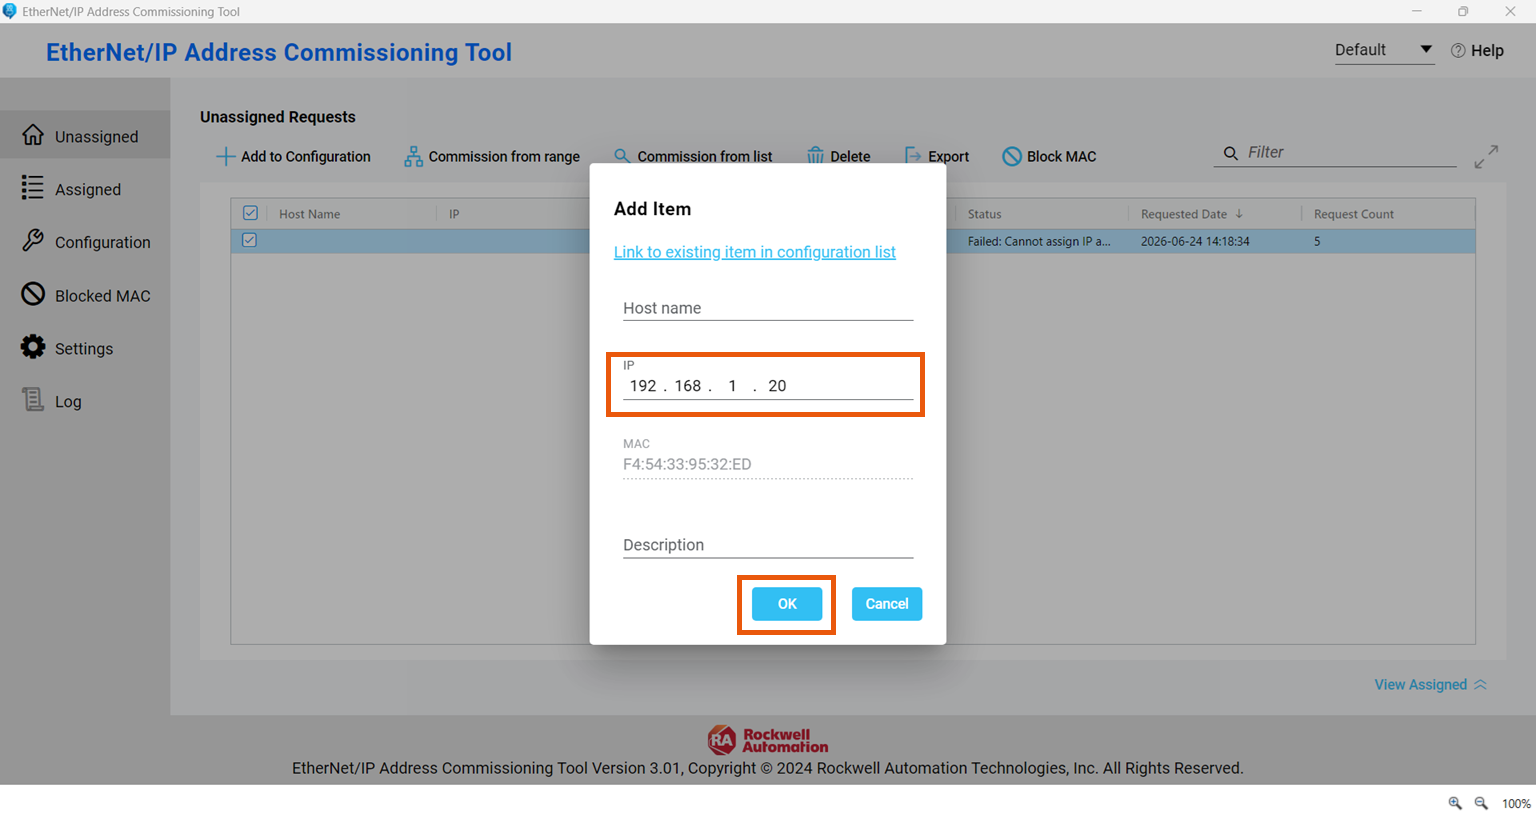
In the Add Item dialog, enter the desired IP address. You can also enter an optional host name and description. Click OK to send the IP address to the controller.
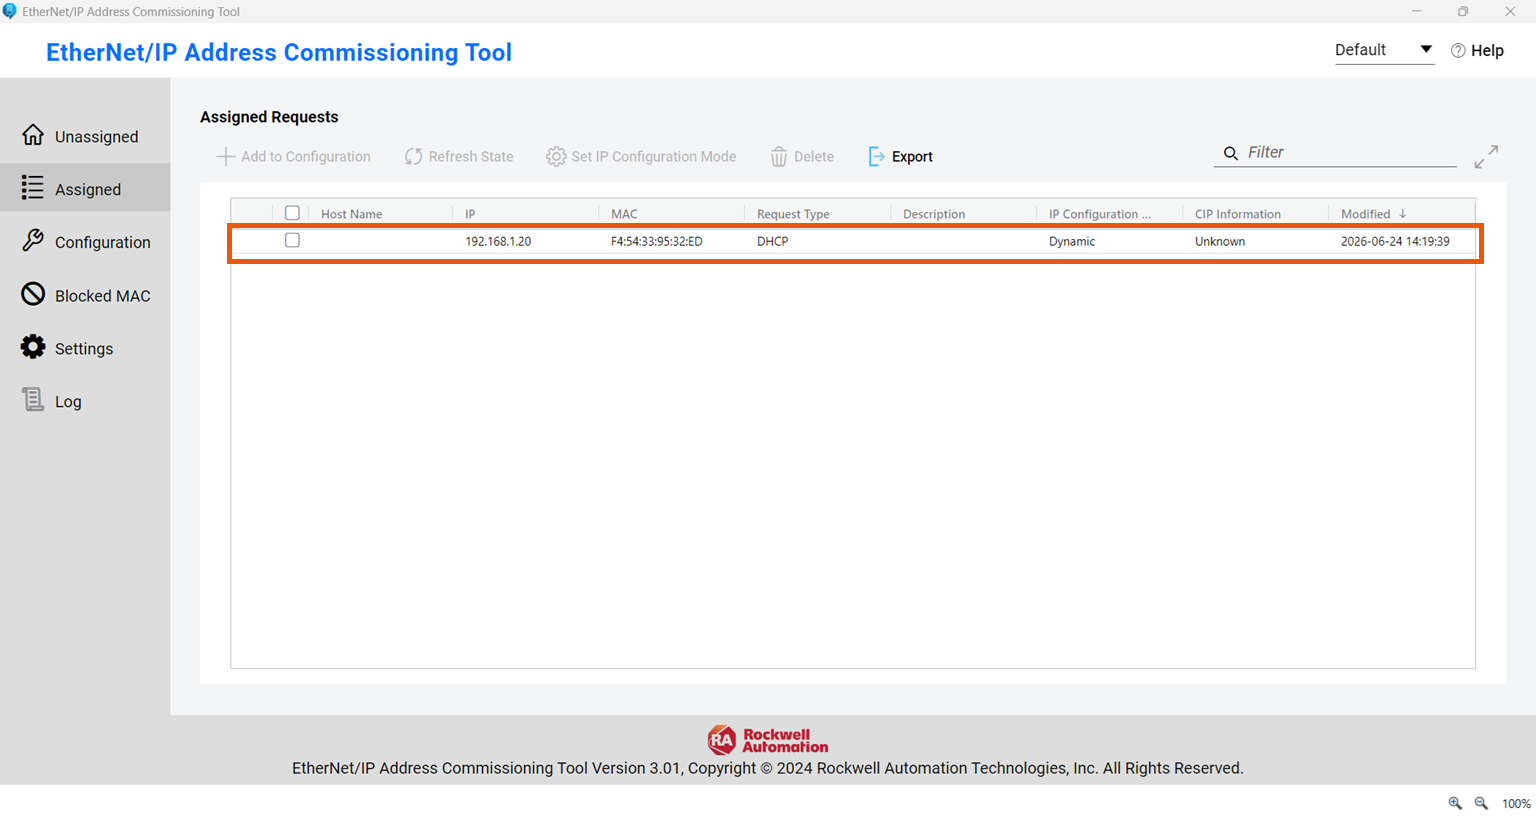
The entry moves from the Unassigned tab to the Assigned tab, confirming the address has been accepted.
Making the IP Address Permanent
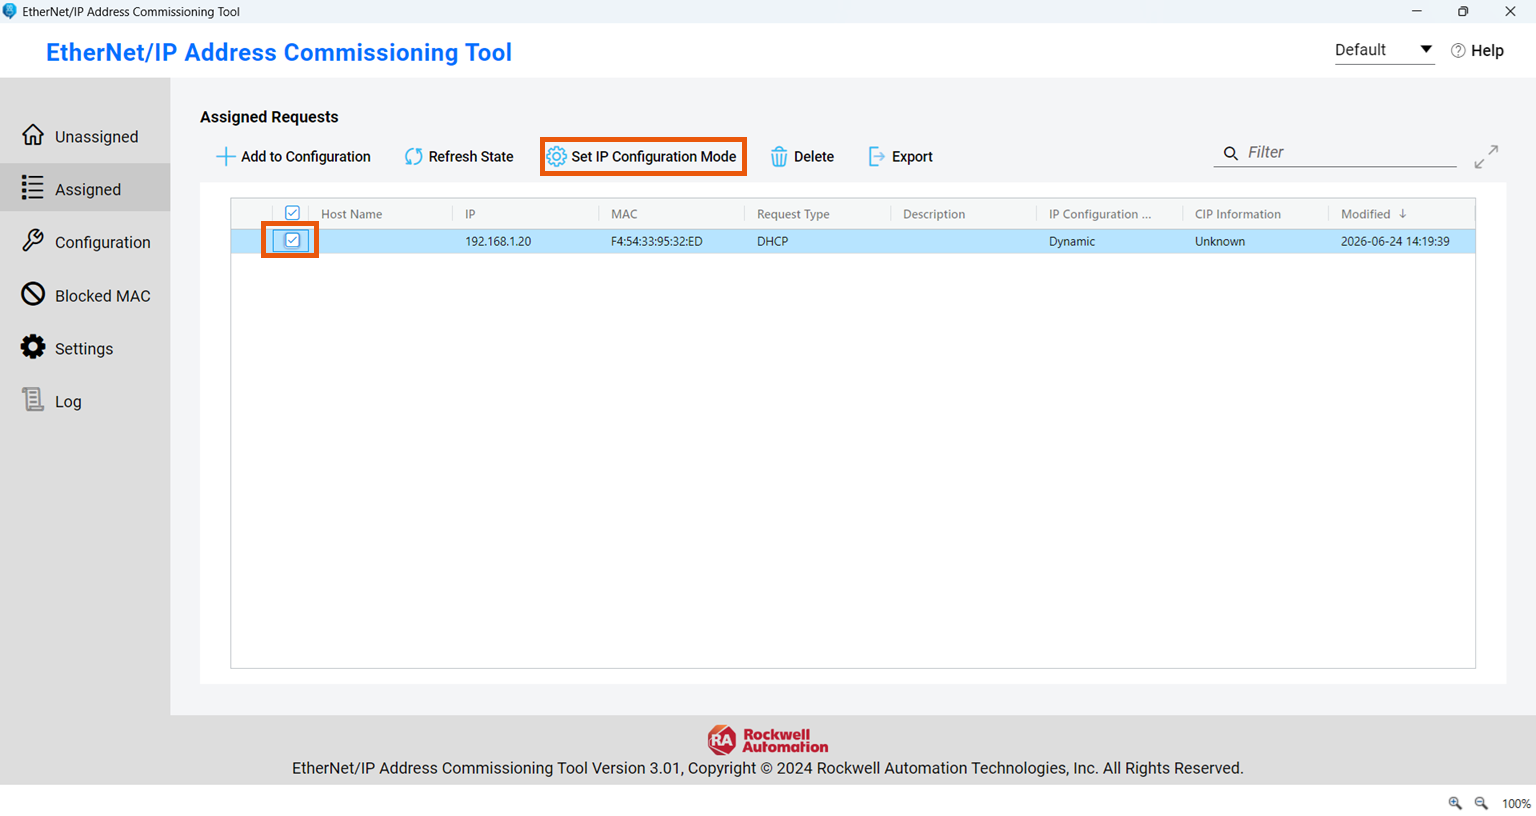
At this point the controller is using the IP address, but it hasn't been stored permanently. When the controller power cycles, it will forget the address and broadcast another BootP/DHCP request.
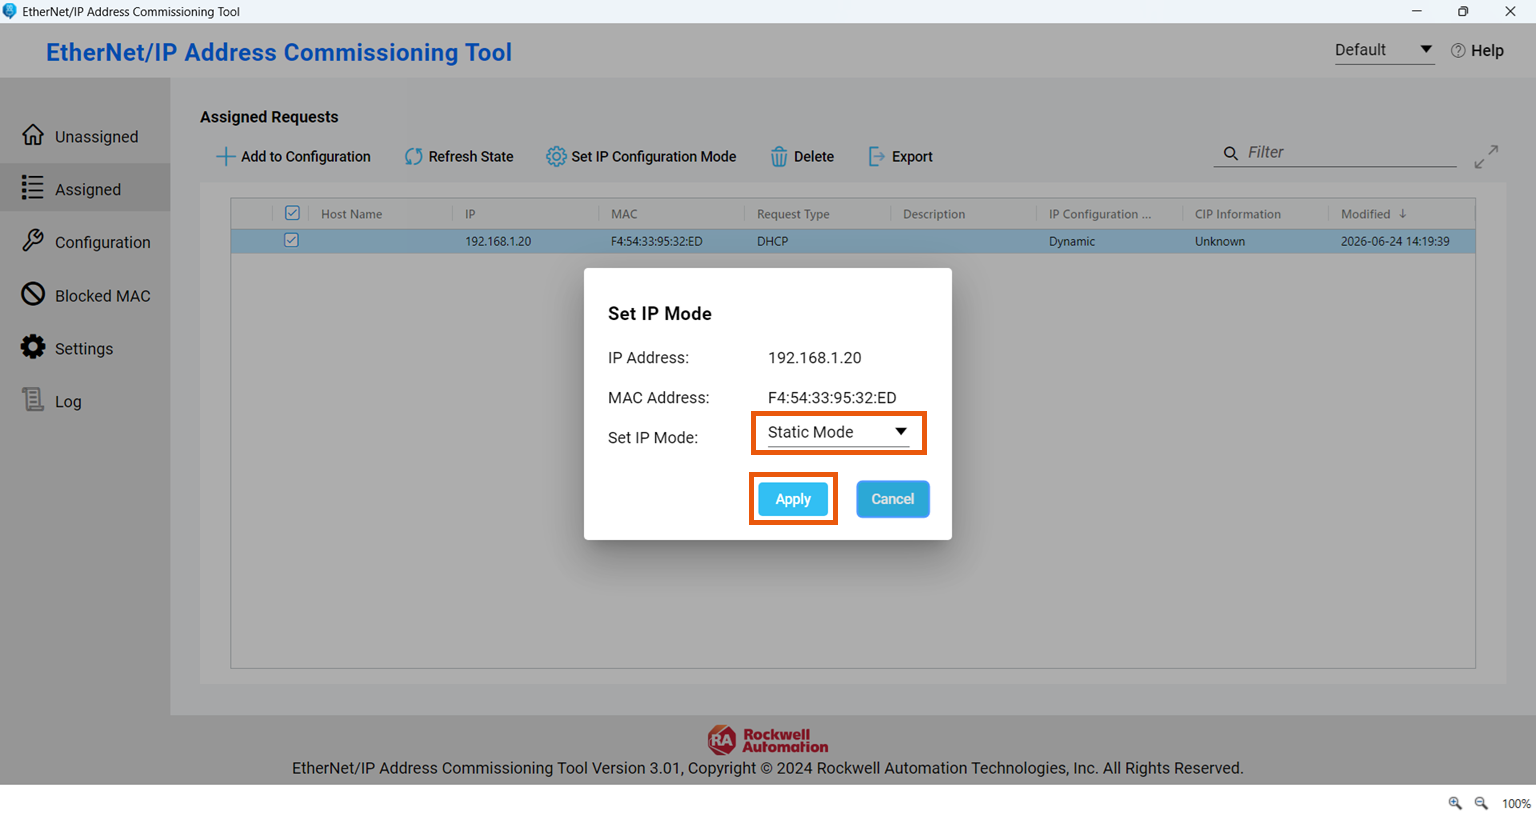
To store it permanently, check the box next to the entry in the Assigned tab and click Set IP Configuration Mode.
In the dialog that appears, select Static Mode from the Set IP Mode dropdown and click Apply.
A success message confirms the IP mode has been set. Click Cancel to close the dialog.
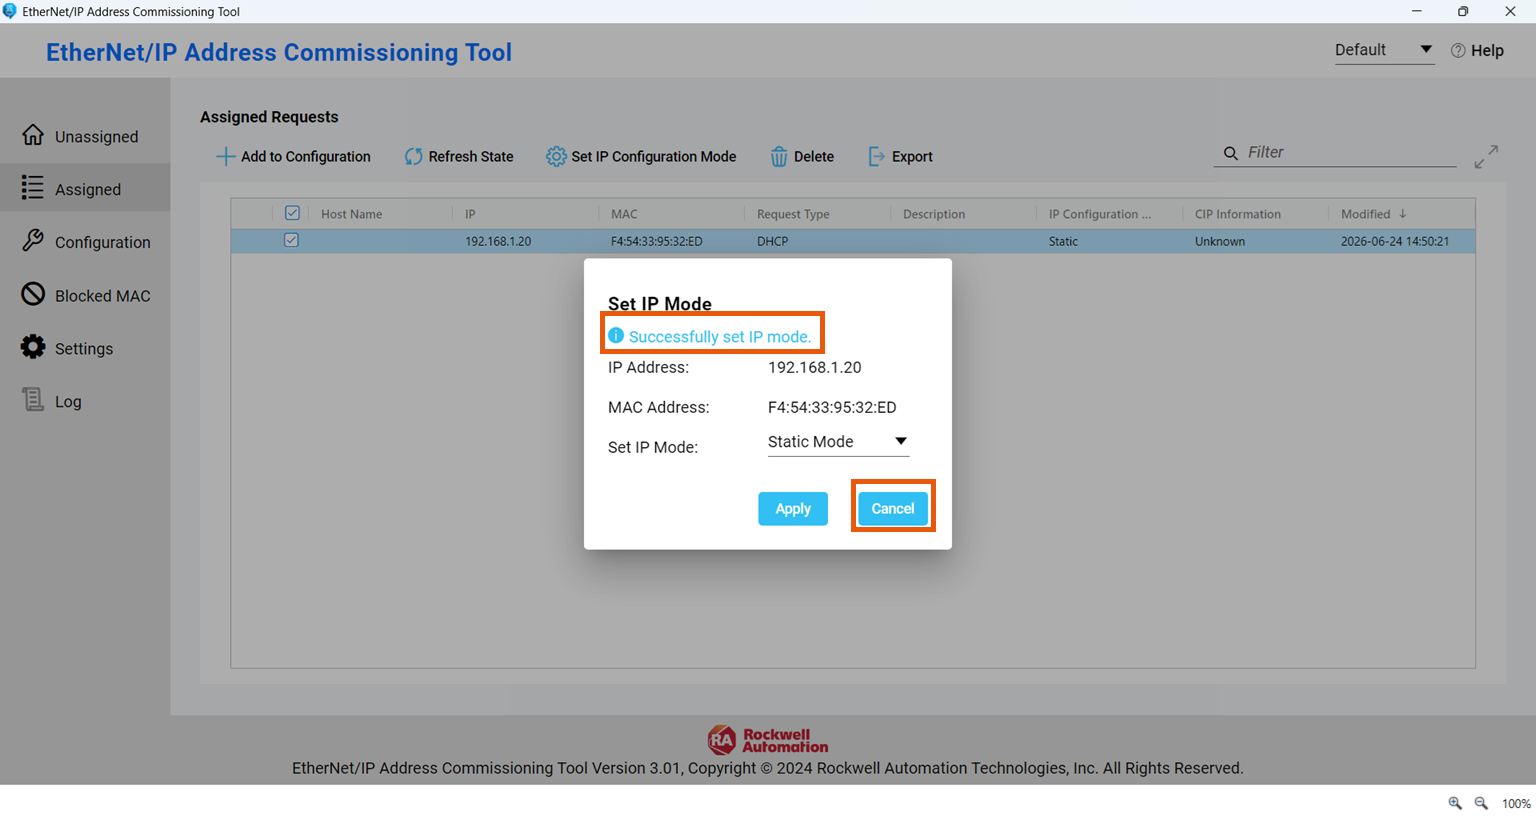
Finally, power cycle the controller and confirm it retained its network configuration.
Wrap Up
The EtherNet/IP Address Commissioning Tool is a reliable option for setting the IP address of any new Logix controller that's broadcasting DHCP requests. It's quick, requires no USB cable, and works across the entire Logix 5000 family.
If you want to practice assigning an IP address to a controller in a browser based simulation with no hardware or software required, sign up to a 30 day free trial of Controls Engineer Academy today.
Learn PLC Programming in your browser
Learn PLC programming by building projects in your browser - no hardware or software required.
Then €29.97/month · Cancel any time