Rockwell Automation has recently open-sourced a set of tools and command line utilities that let you use Git as a Version Control System, or VCS, for Studio 5000 Logix Designer. Using these tools, system integrators and OEMs can implement a robust version control system that tracks who made changes to software and what changes were made over time. When combined with GitHub, you also get a remote backup solution.
In this tutorial, I'll show you how to:
- Set up Custom VCS Tools on your computer,
- Use the Command Line Interface, or CLI, to commit changes to a local repository and push the changes to GitHub, and
- How to integrate the VCS Custom Tools with the Studio 5000 Logix Designer UI through the Custom Tools menu
Let's get started by talking about how these tools work.
Custom VCS Tools
The Custom VCS Tools convert a binary ACD file into Git friendly text files in a two step process.
First, the ACD file is converted to an L5X file, which is an XML representation of a Studio 5000 Logix Designer project.
Second, the L5X file is exploded into smaller text files which make it easier to track changes in a Git repository.
These small text files are then committed to a local Git repository by the tool.
To use this tool, you will need to have a few things installed on your computer.
Prerequisites
Rockwell Automation's Custom VCS Tools are delivered as a .NET 10 application that uses the Studio 5000 Logix Designer SDK to convert projects into text files. To use these tools, you will need to have .NET 10 installed on your machine. You will also need to have Studio 5000 Logix Designer and the Studio 5000 Logix Designer SDK installed.
To commit text files to a local Git repository, you will need to have Git installed on your computer.
Finally, to push changes to a remote repository hosted on GitHub, you will need to have a GitHub account.
Except Studio 5000 Logix Designer, all of this software can be downloaded and set up for free using the links below.
.NET 10: https://dotnet.microsoft.com/en-us/download/dotnet/10.0
Git: https://git-scm.com/install/windows
GitHub: https://github.com/signup
Set Up the Tools
Now, let's download and install Rockwell's Custom VCS Tools.
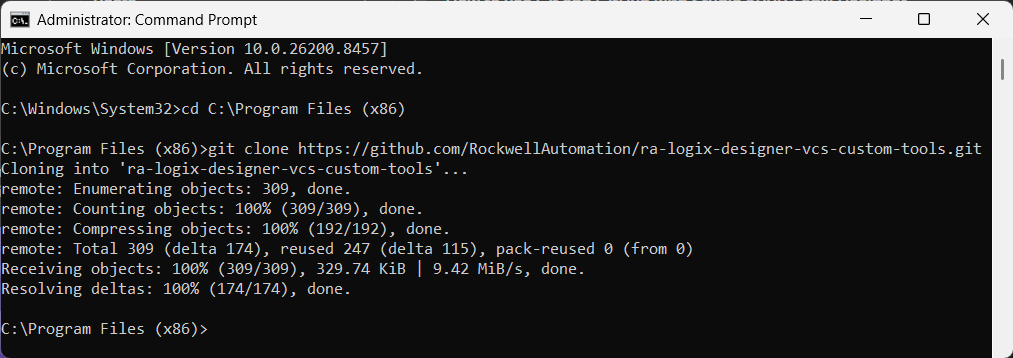
First, I will clone the repository from GitHub to my local machine using the Clone command. I want to clone this project to my Program Files (x86) directory, so I used the cd command to change to that directory and then use clone command to download the project files.
cd C:\Program Files (x86)
git clone https://github.com/RockwellAutomation/ra-logix-designer-vcs-custom-tools.git
After running the clone command, the repository is downloaded to my computer.
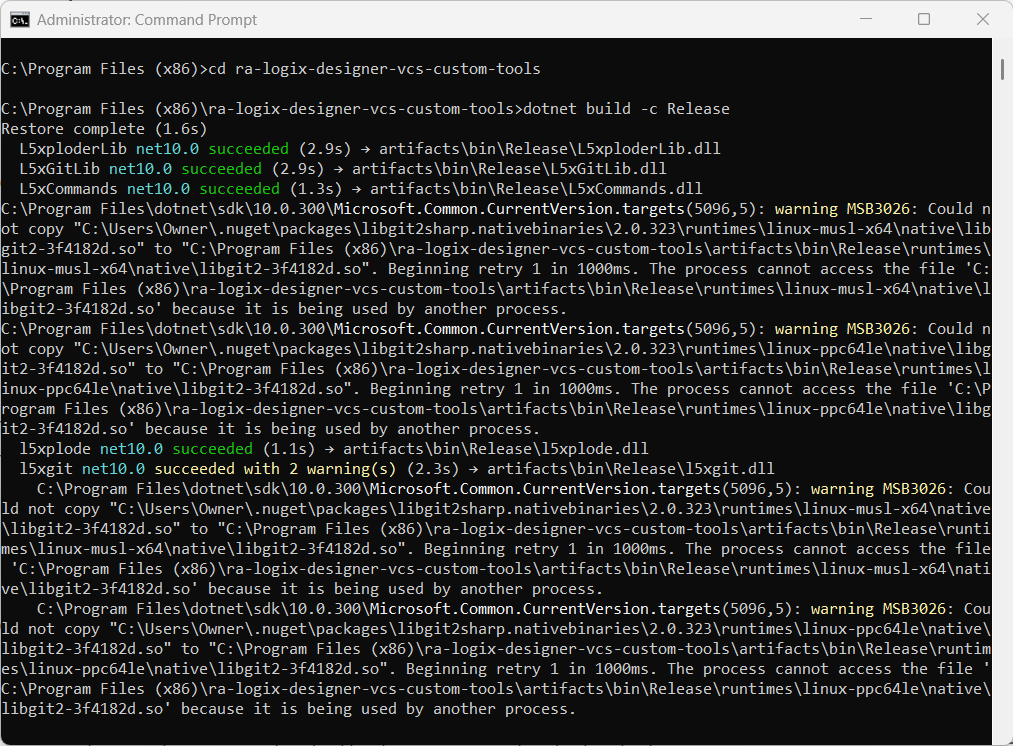
Now, I can use the cd command to move into the downloaded repository and use the build command to build the code into an executable file.
cd ra-logix-designer-vcs-custom-tools
dotnet build -c Release
After a minute or two, I see that the project was built successfully into a binary file.
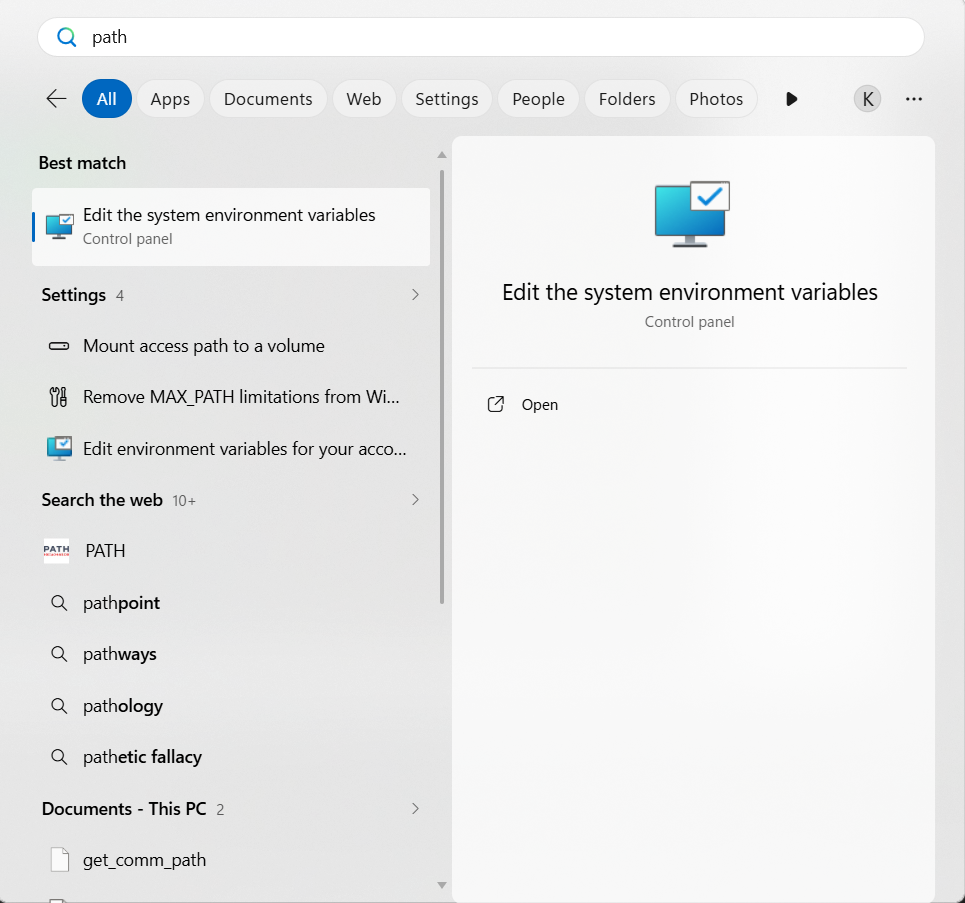
The last thing that I will do is add these tools to my PATH variable so that I can use them from anywhere on my computer. To do that, I search for "path" in the Windows search bar and select "Edit the System Environment Variables"
In the System Properties dialog that opens, I click on the Environment Variables button, activate the PATH variable in the System Variables pane, and then click Edit.
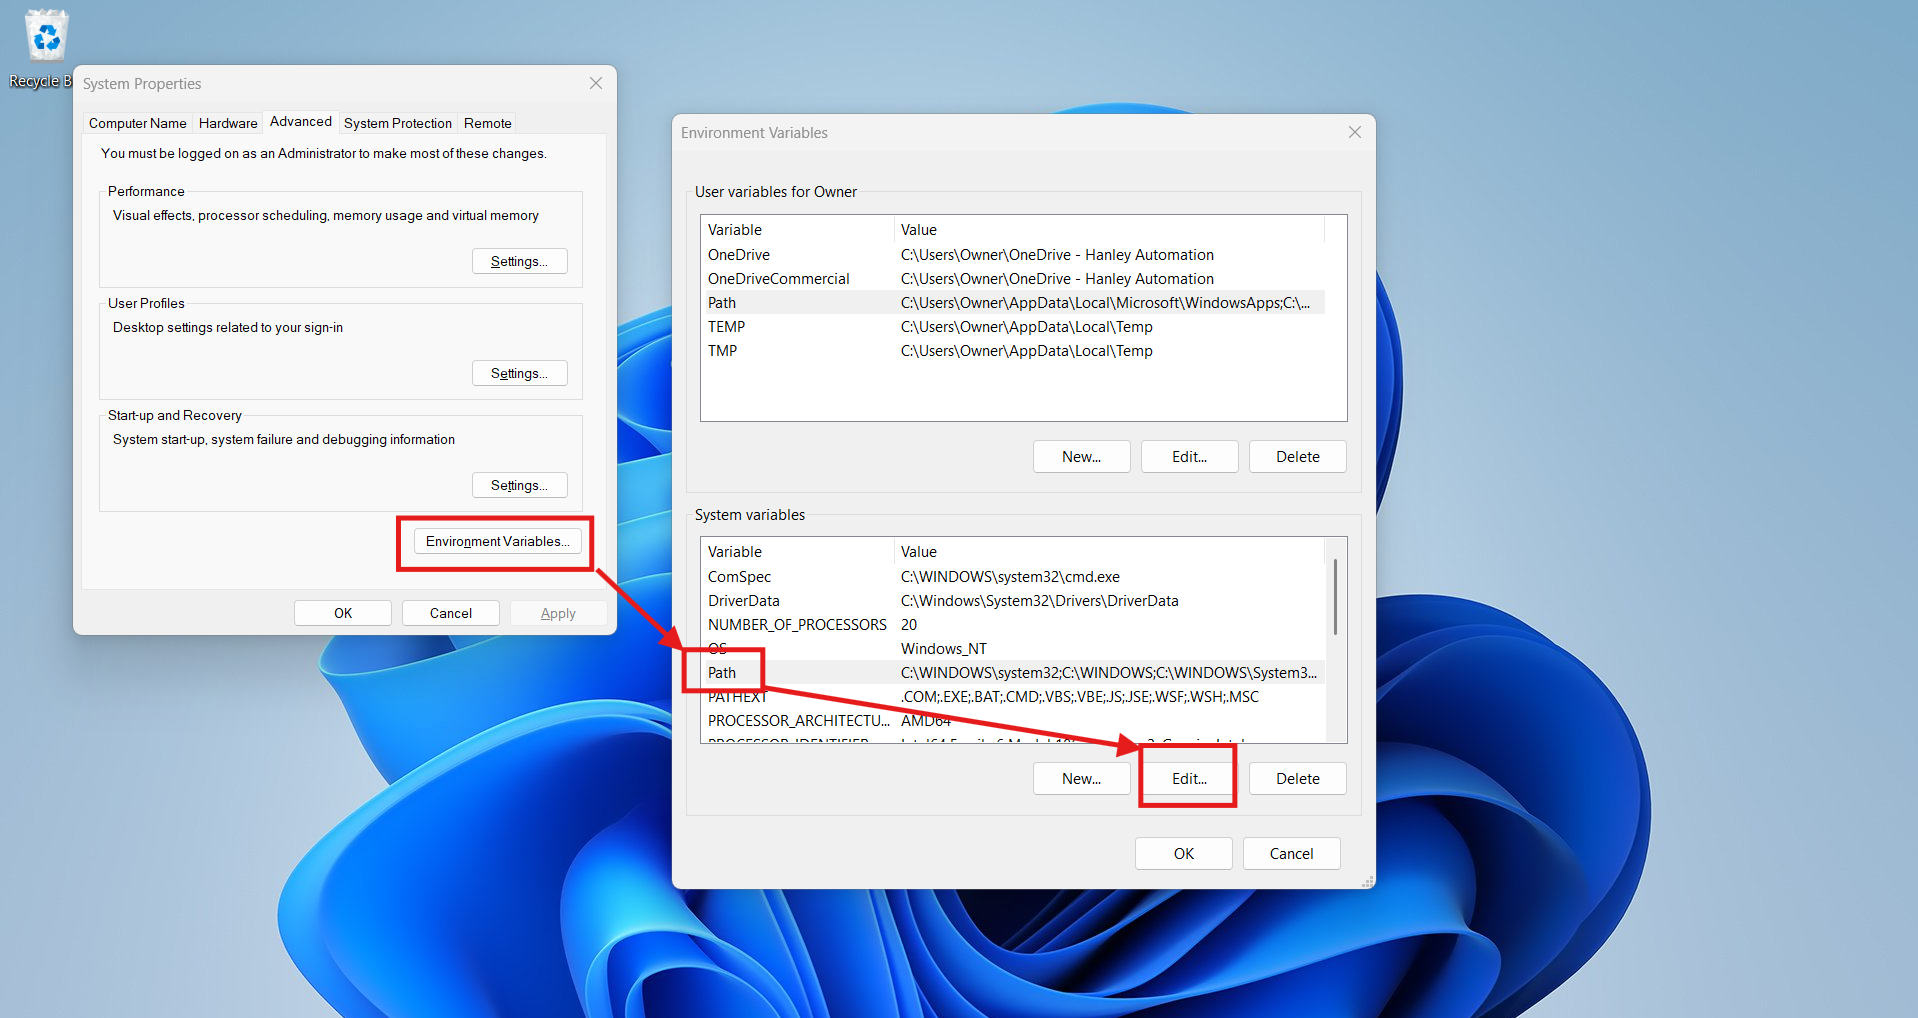
In the Edit Environment Variables dialog that opens, I click on the New button and add the location of the compiled Custom VCS Tools.
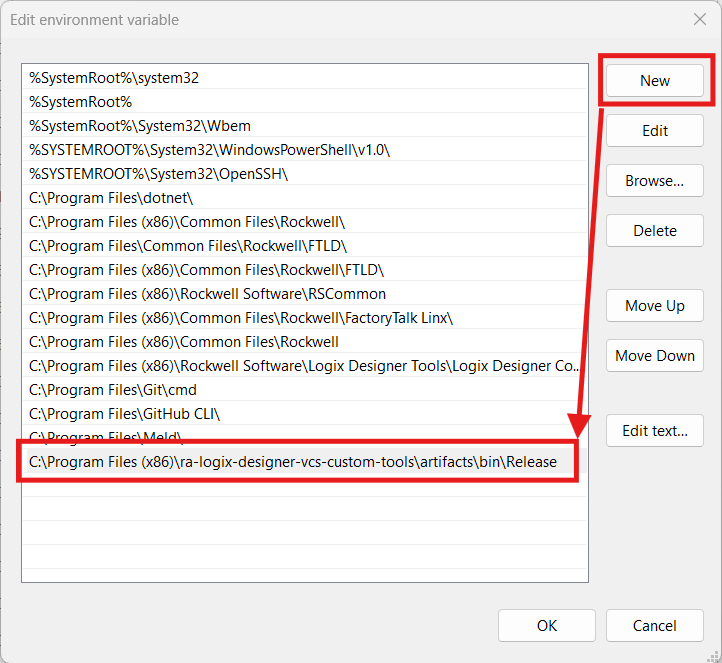
I click OK to close the dialog boxes and restart my computer. Once it is poweredup again, I test to see if the tools are now on my PATH by changing to another location and running the help command.
l5xgit -h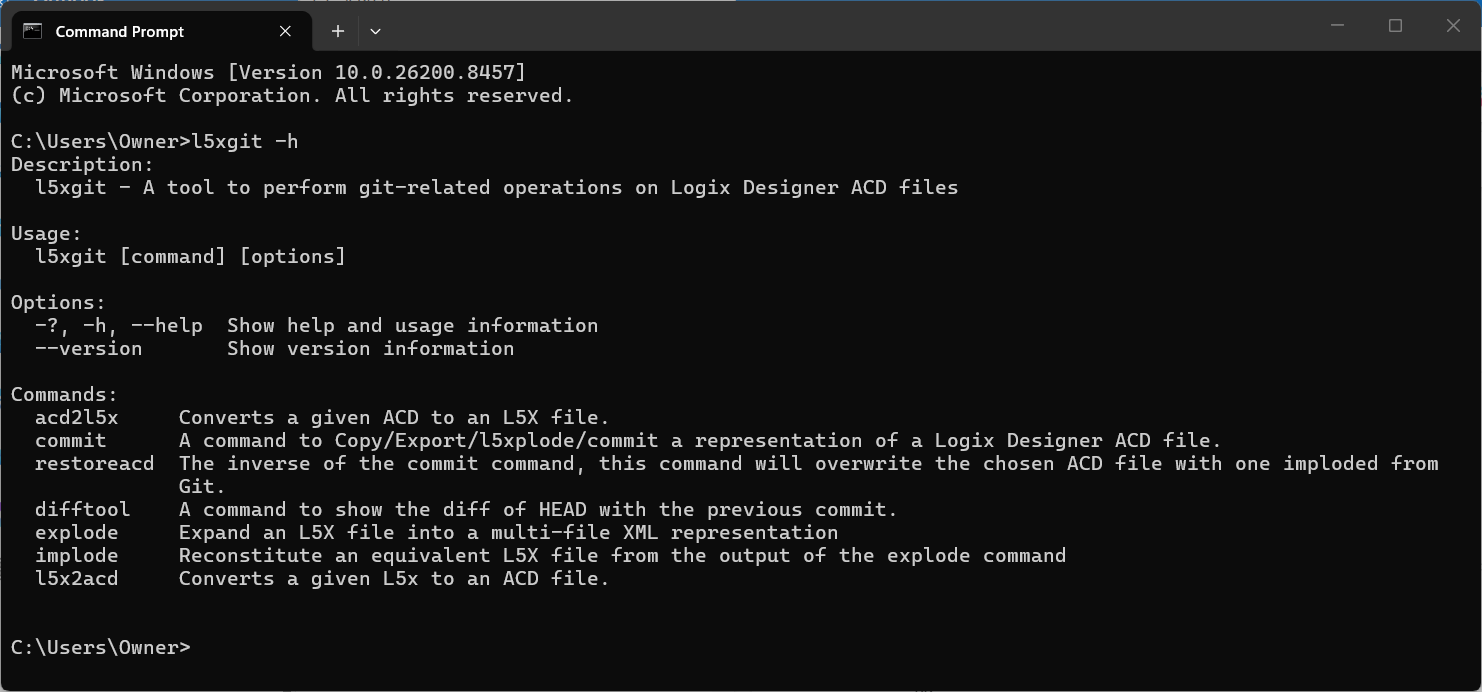
Set Up the Project
Now that the tools are setup, we can setup the project.
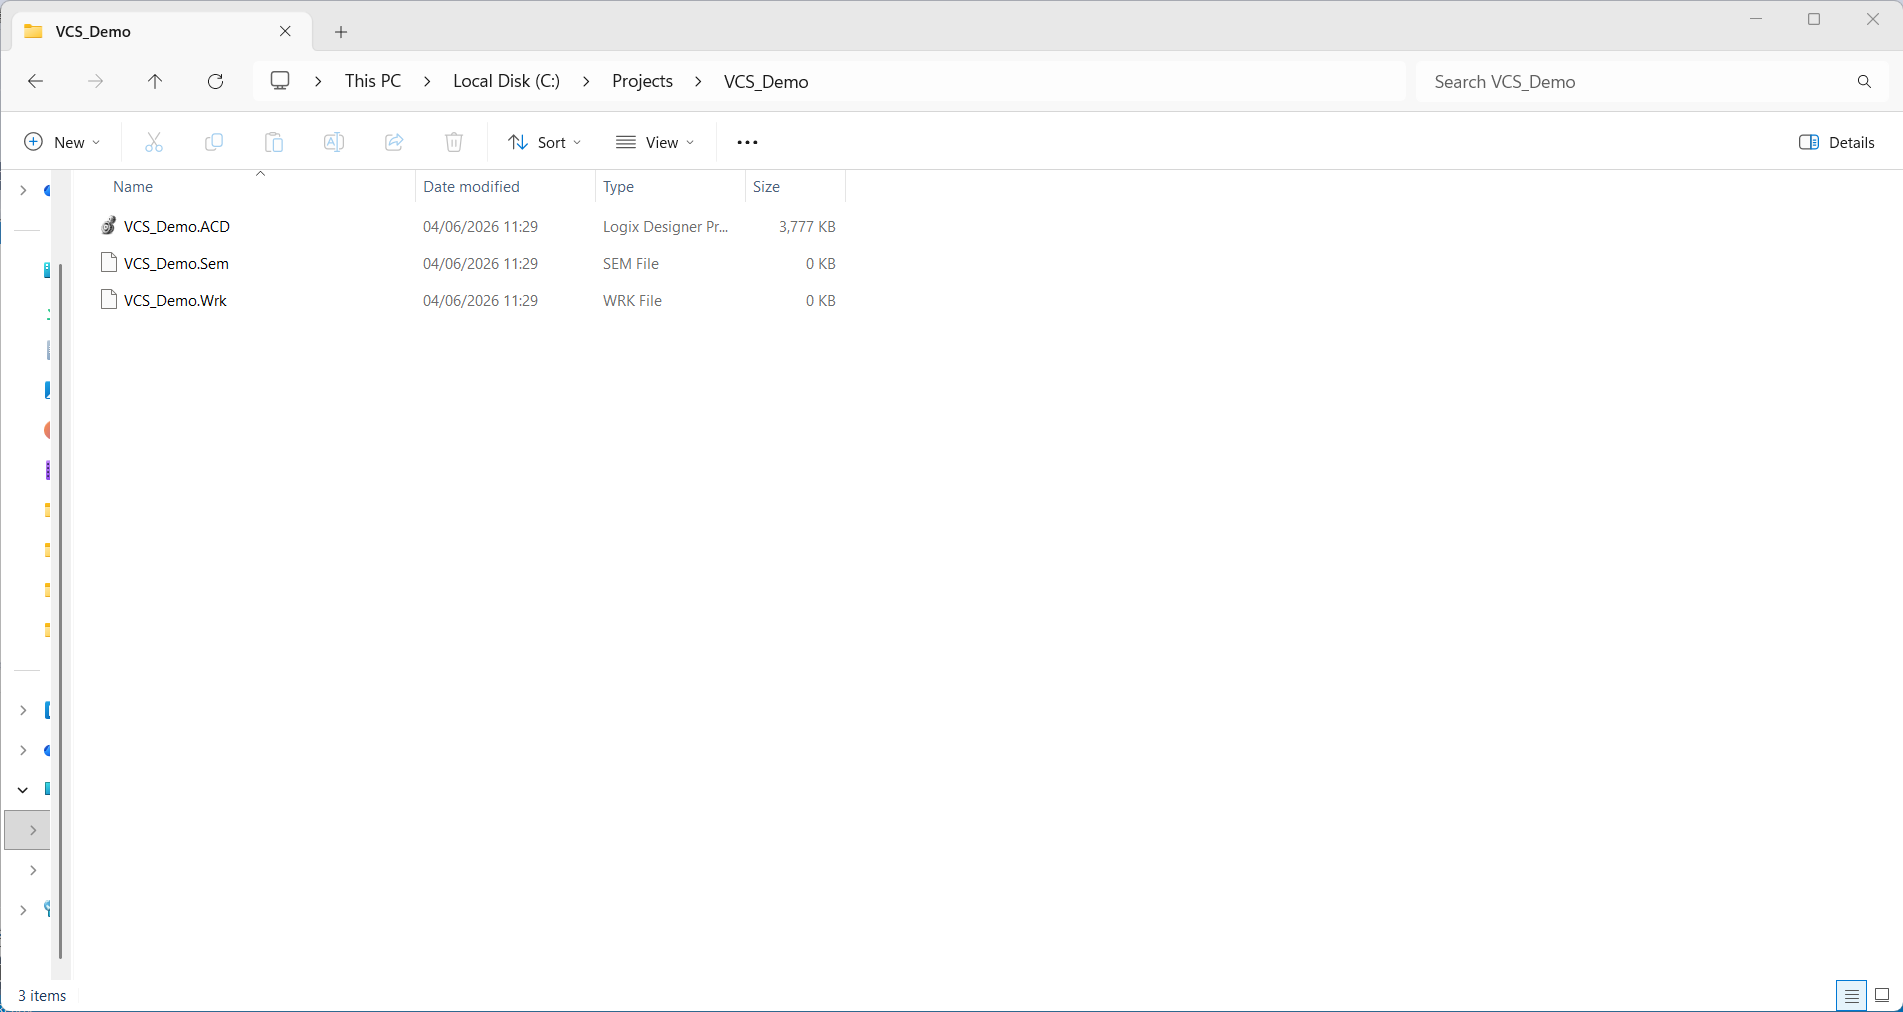
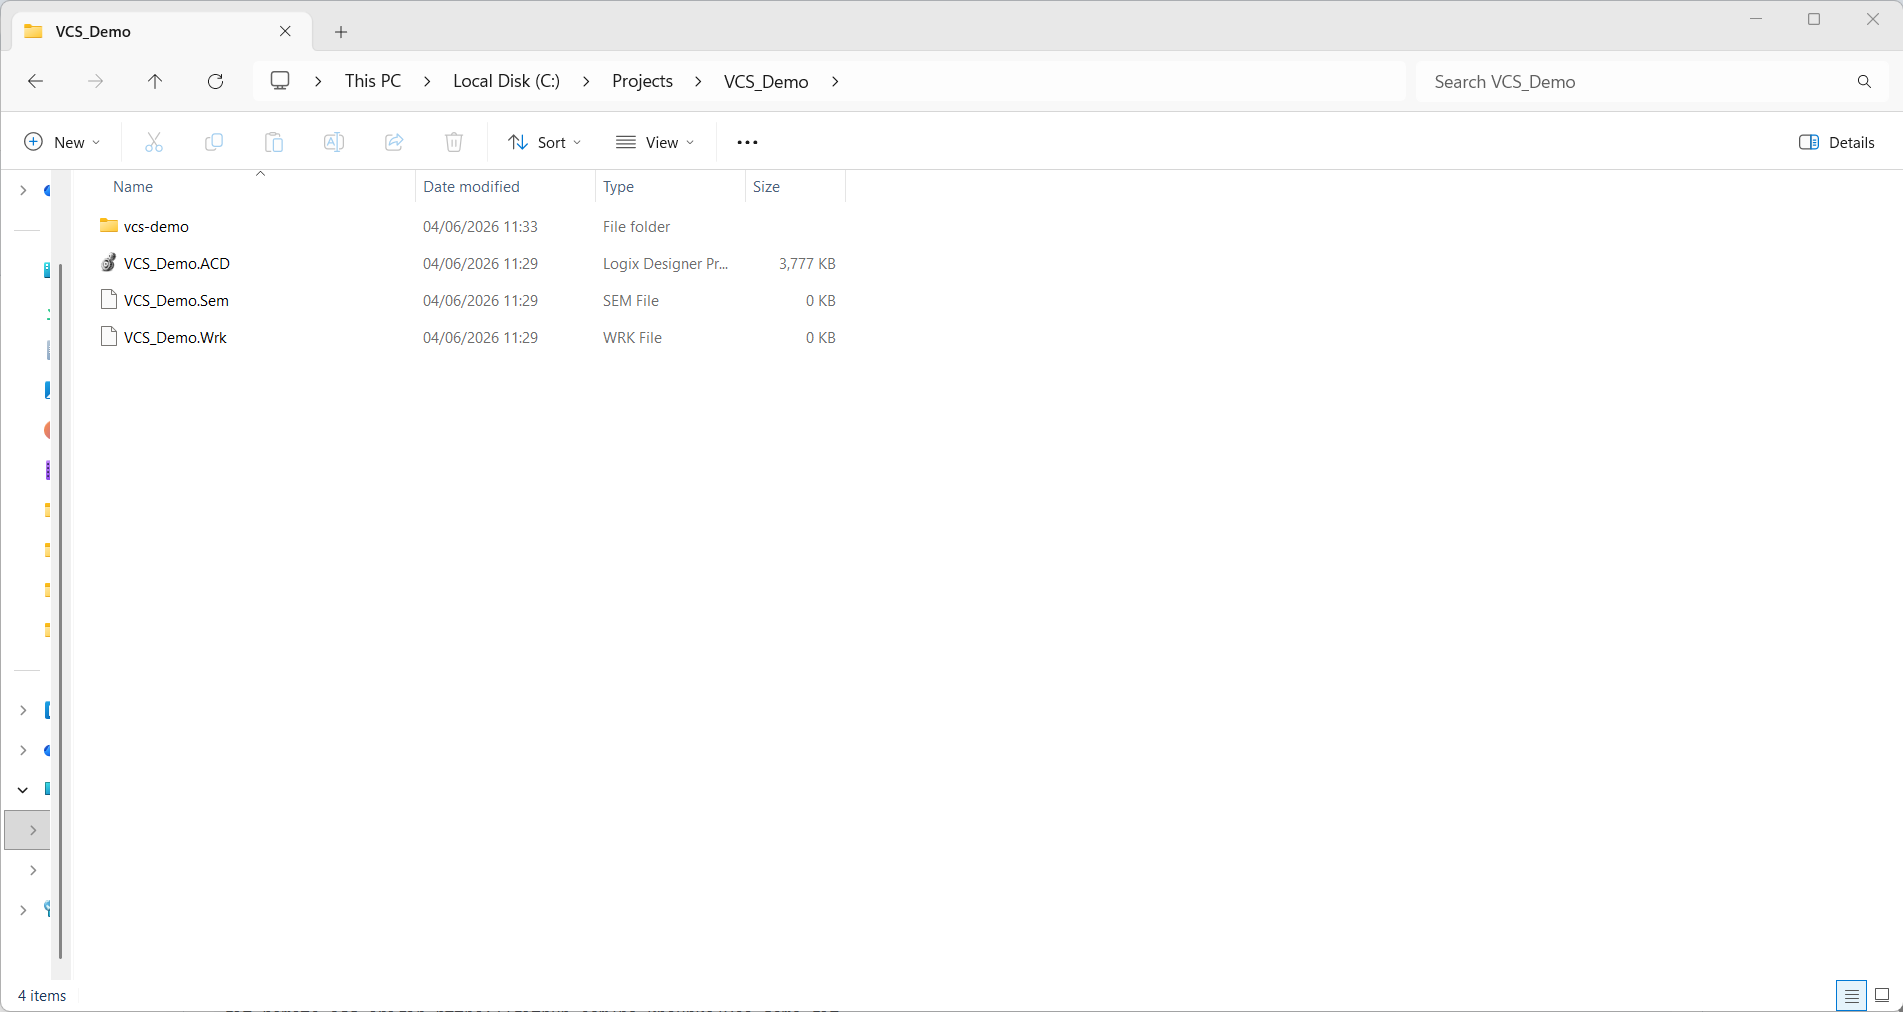
To start, I create a new folder called "VCS_Demo" on my computer. This folder will store the Studio 5000 Logix Designer project, VCS Custom Tools configuration and the local Git repository.
Next, I create a Studio 5000 Logix Designer project called VCS_Demo and store it in this folder.
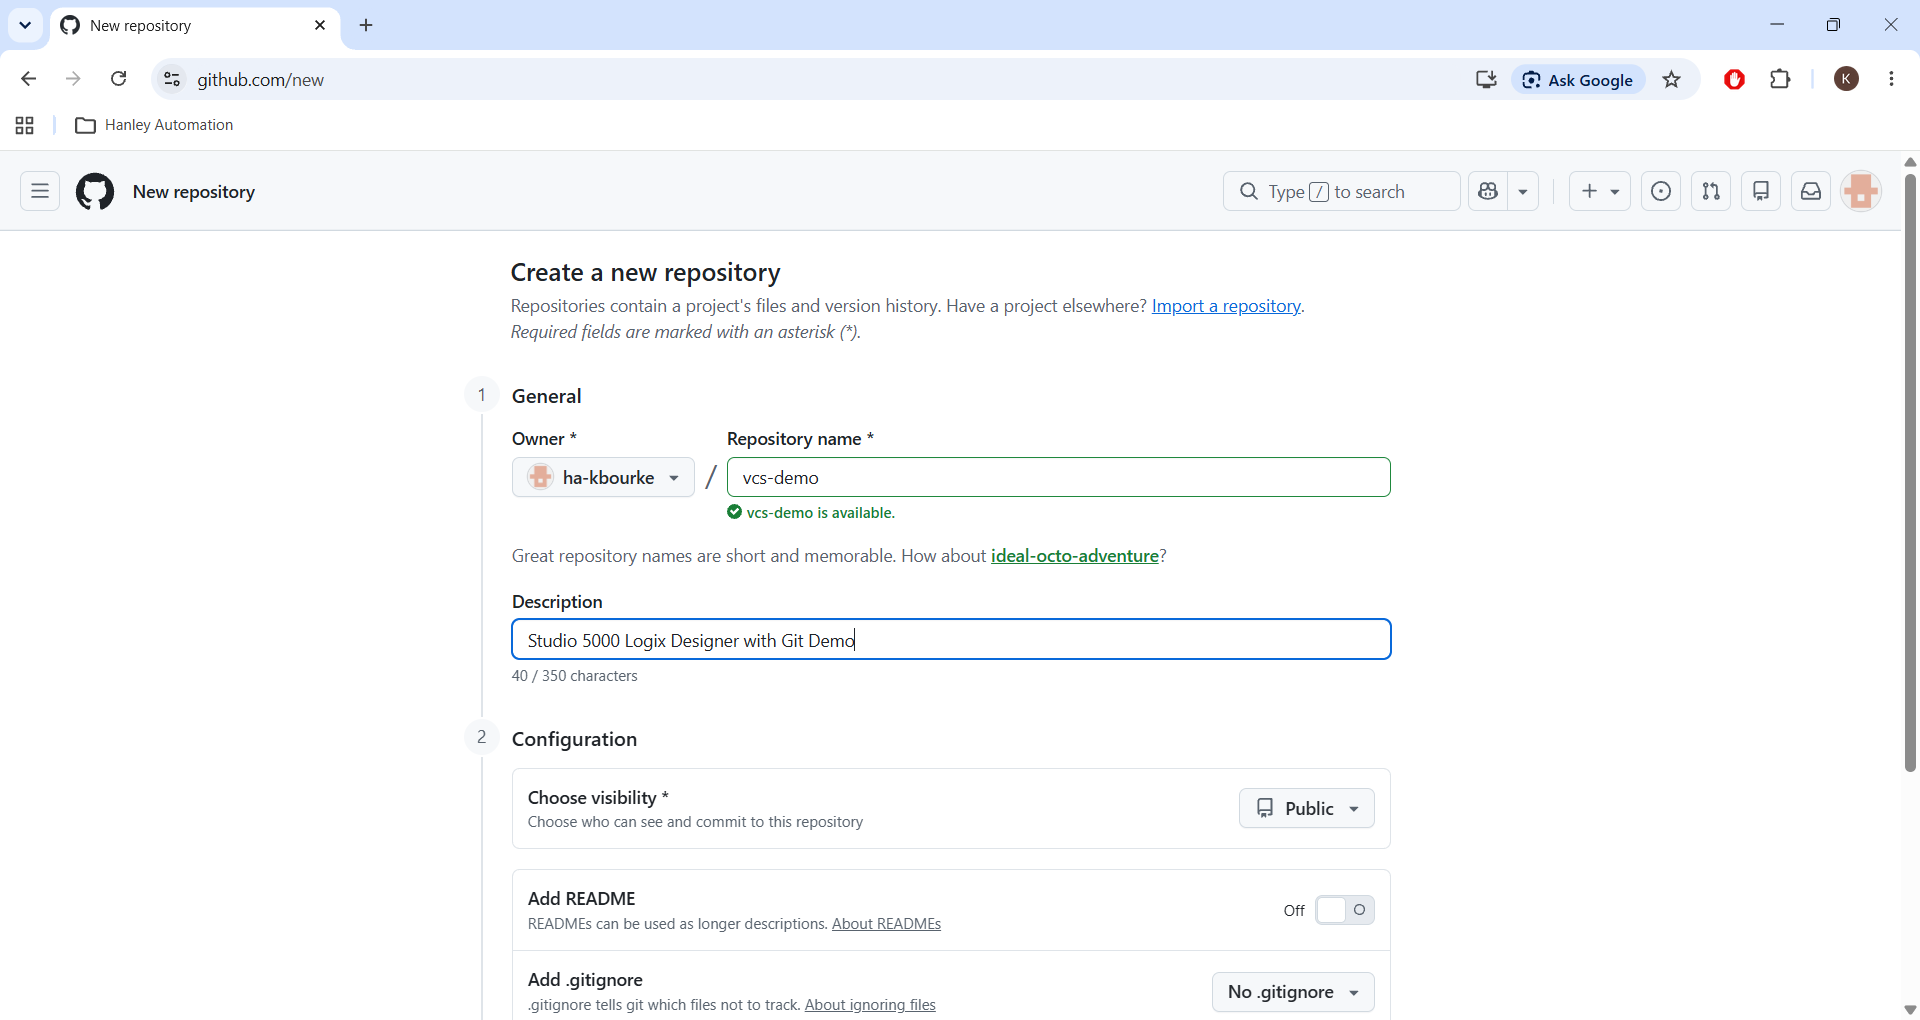
Next, I go to GitHub and create a new repository called vcs-demo.
After creating the repository, I clone it to the VCS_Demo folder on my computer.
VCS with the CLI
Now that our project is set up, I can use the VCS Custom Tools from a Command Prompt window to make commits to my local Git repository.
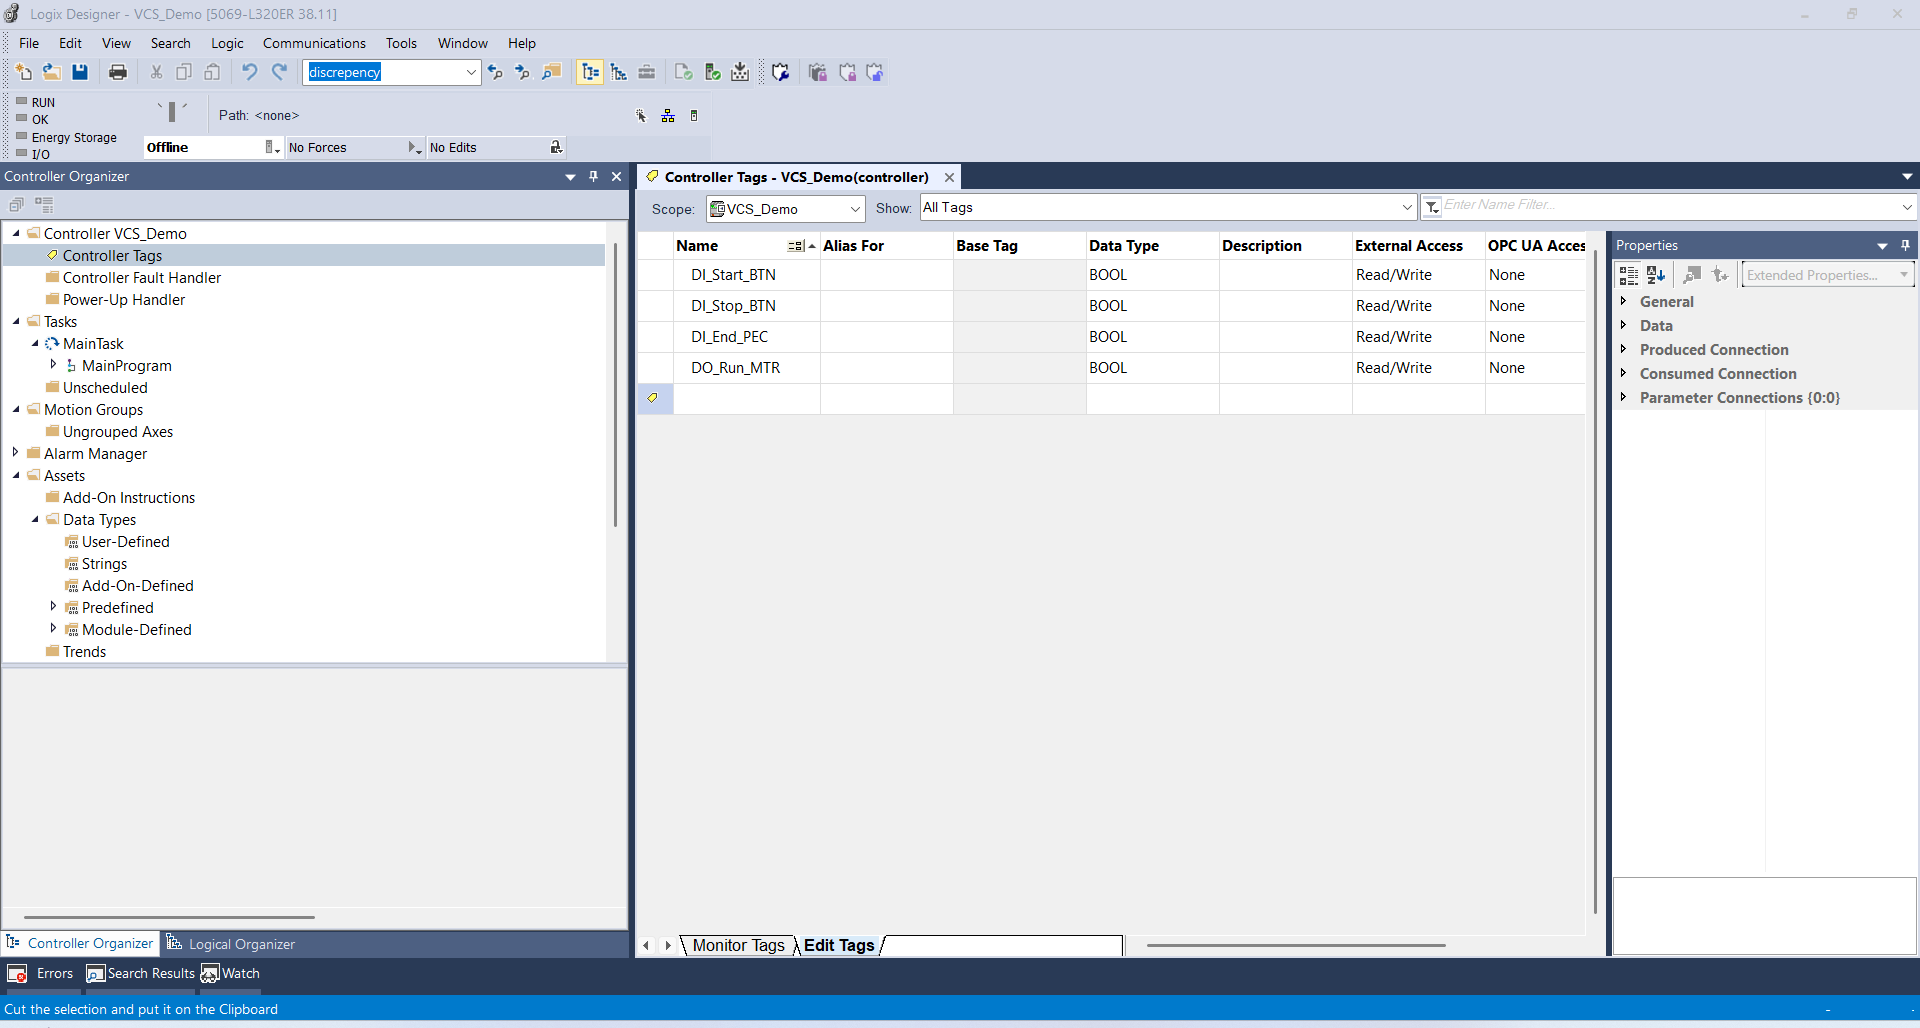
To demonstrate this, I have declared the tags that I need in my project.
Then I use the l5xgit commit command with the acd flag and the path to the project.
l5xgit commit --acd C:\Projects\VCS_Demo\VCS_Demo.acdThe first time I run this command, I have to provide some information to configure the project. The first bit of information is the location of the Git repo where the exploded files will be stored and the second is if a commit message is required for every commit.
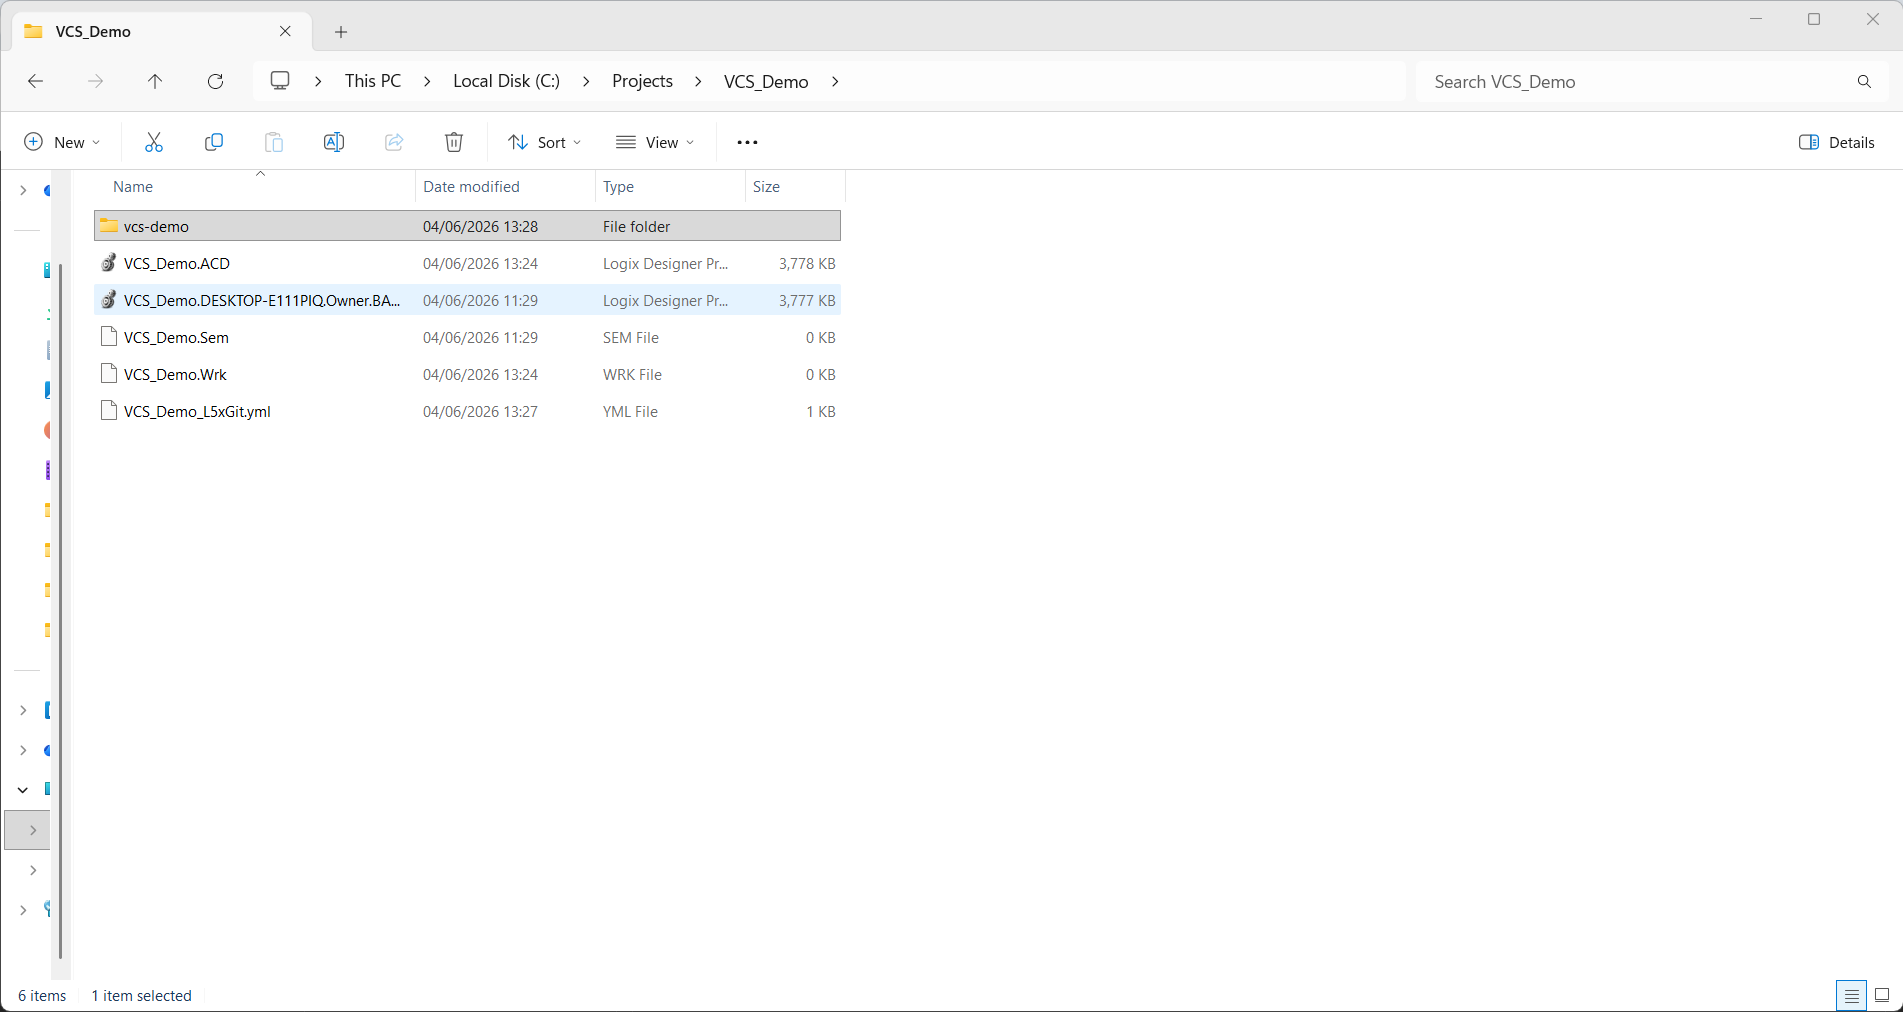
Once this configuration has been complete, I provide a commit message and the tool explodes the ACD file into text files and commits them to the repository.
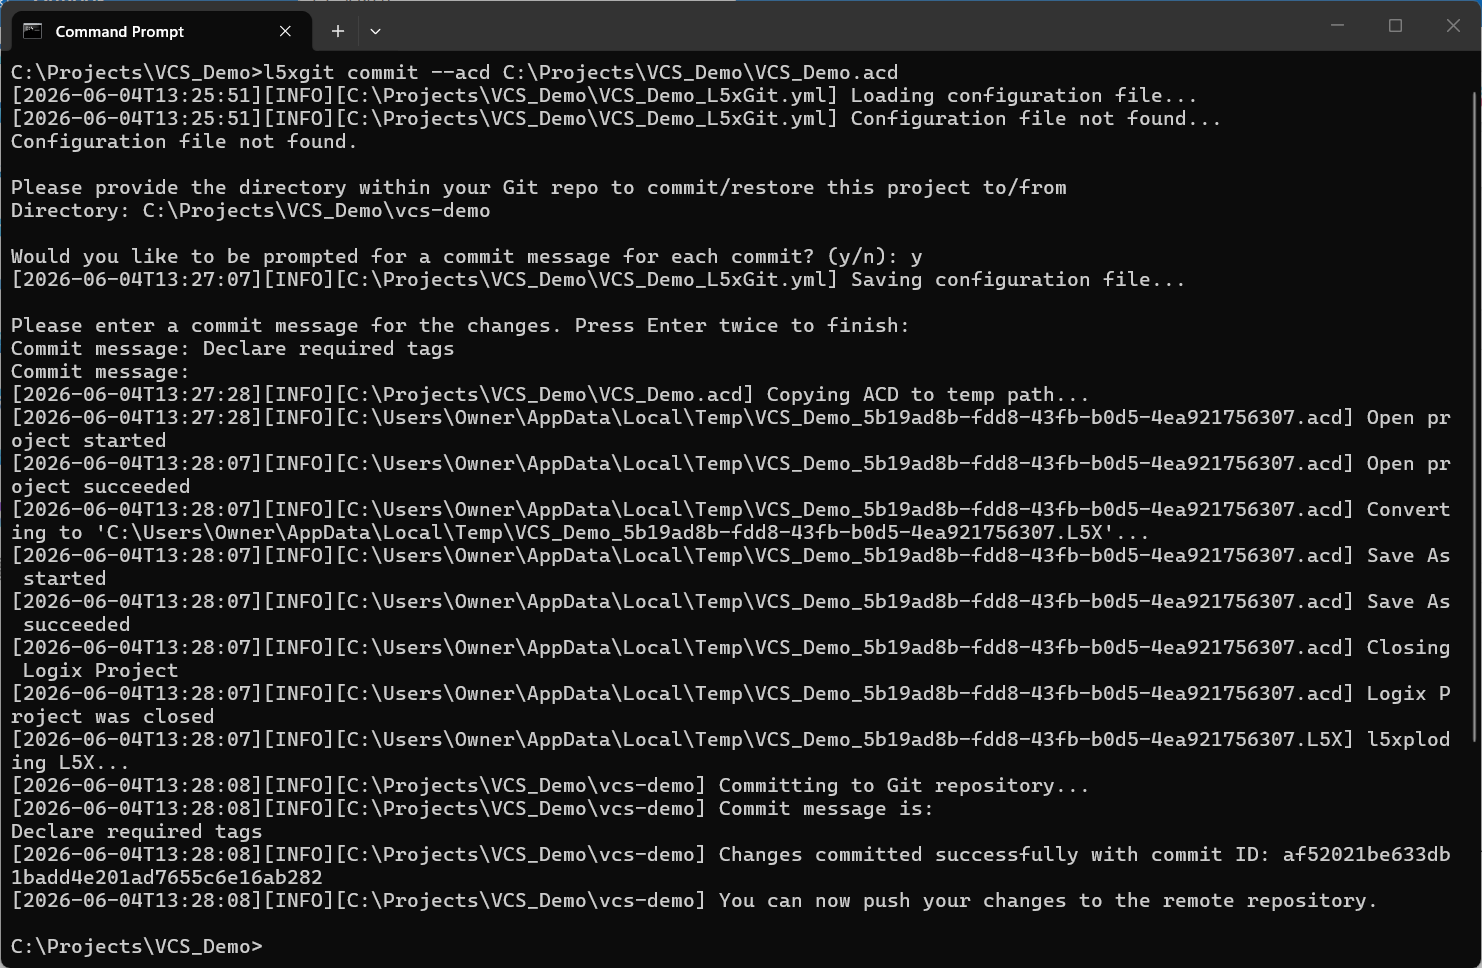
One thing to note is that you only need to do this configuration the first time you make a commit for a project. The configuration information is stored in a YAML file in the same directory as the Studio 5000 Logix Designer project for future commits.
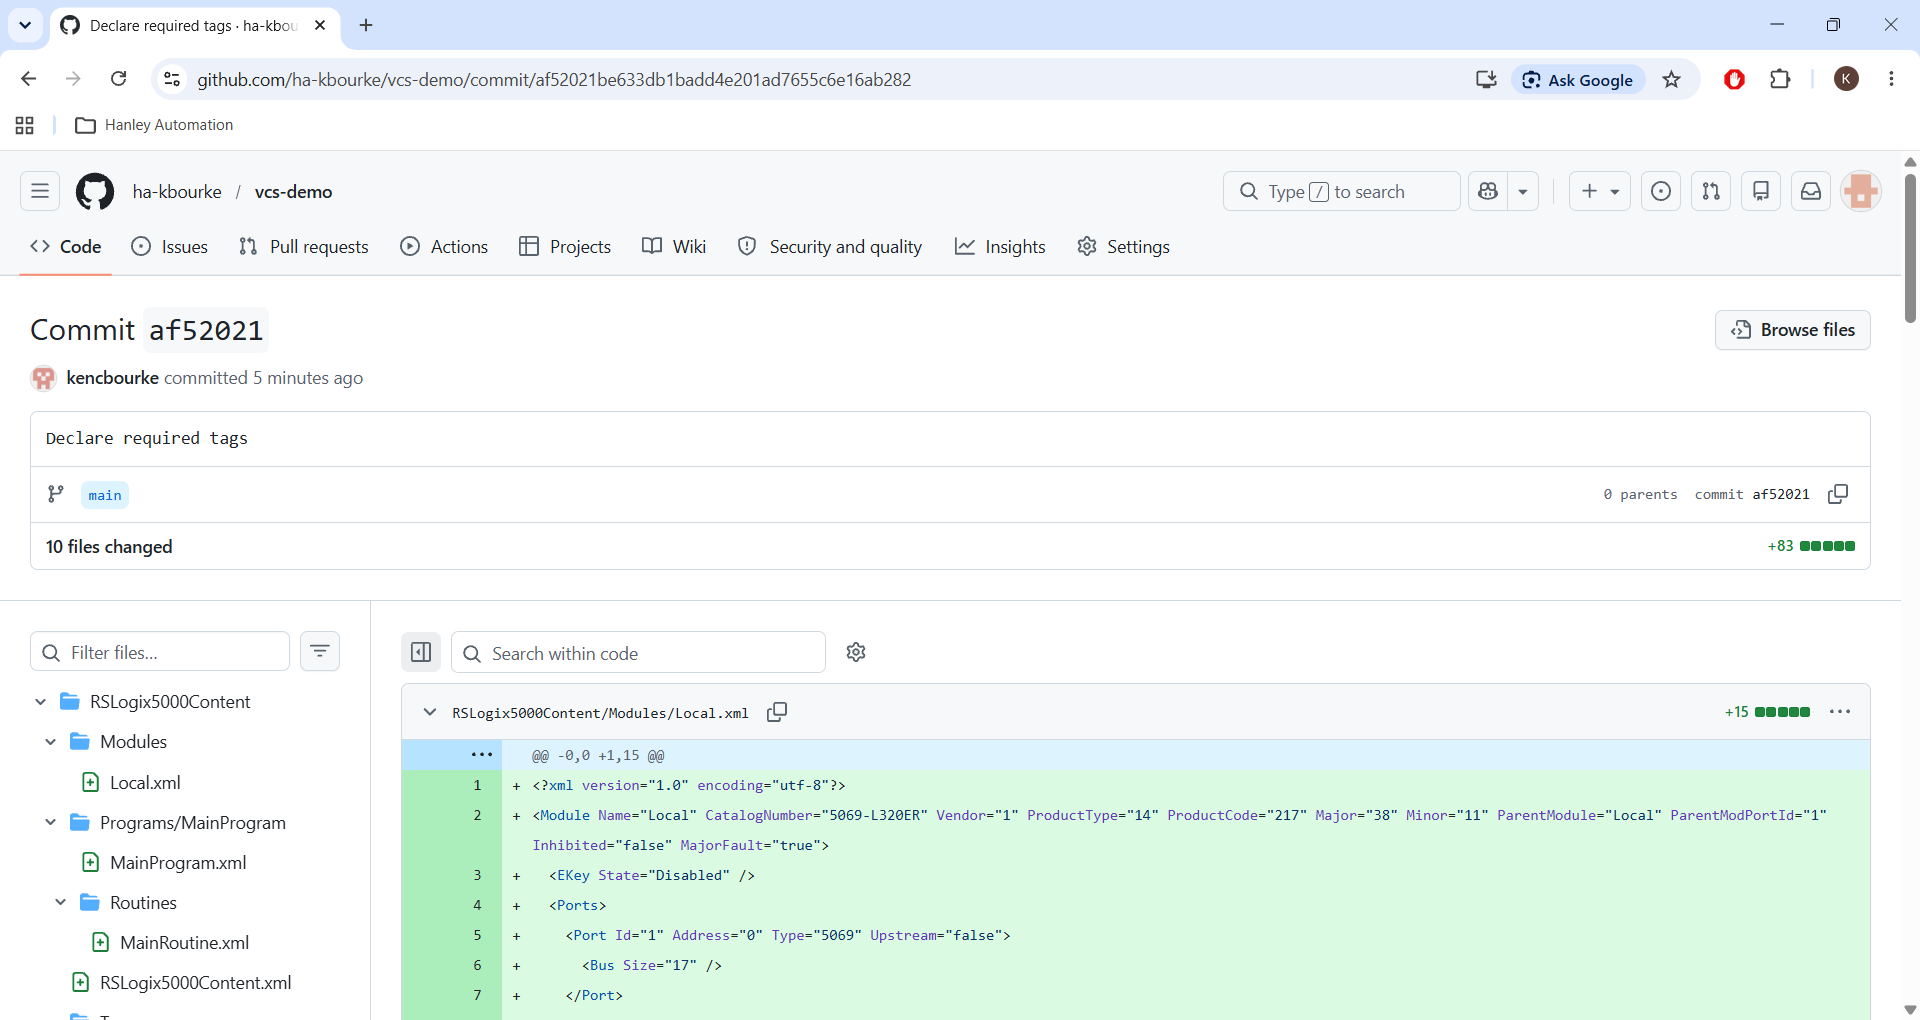
Now I can push this change to the remote repository using the git push command.
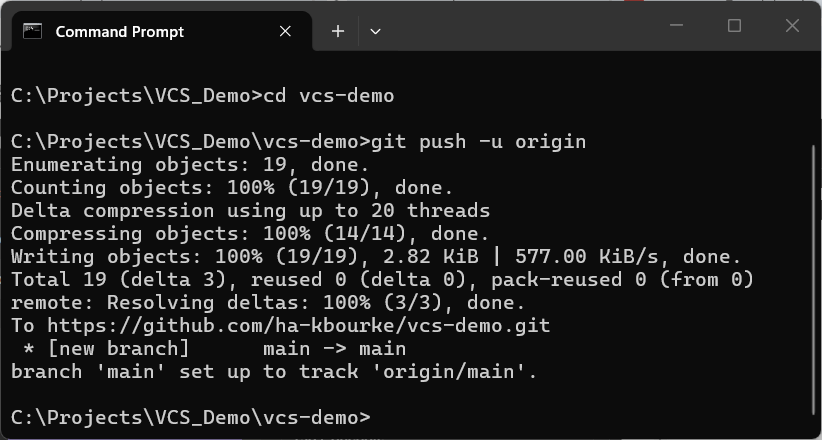
And in GitHub, I can see the changes that have been made to the code.
VCS with the UI
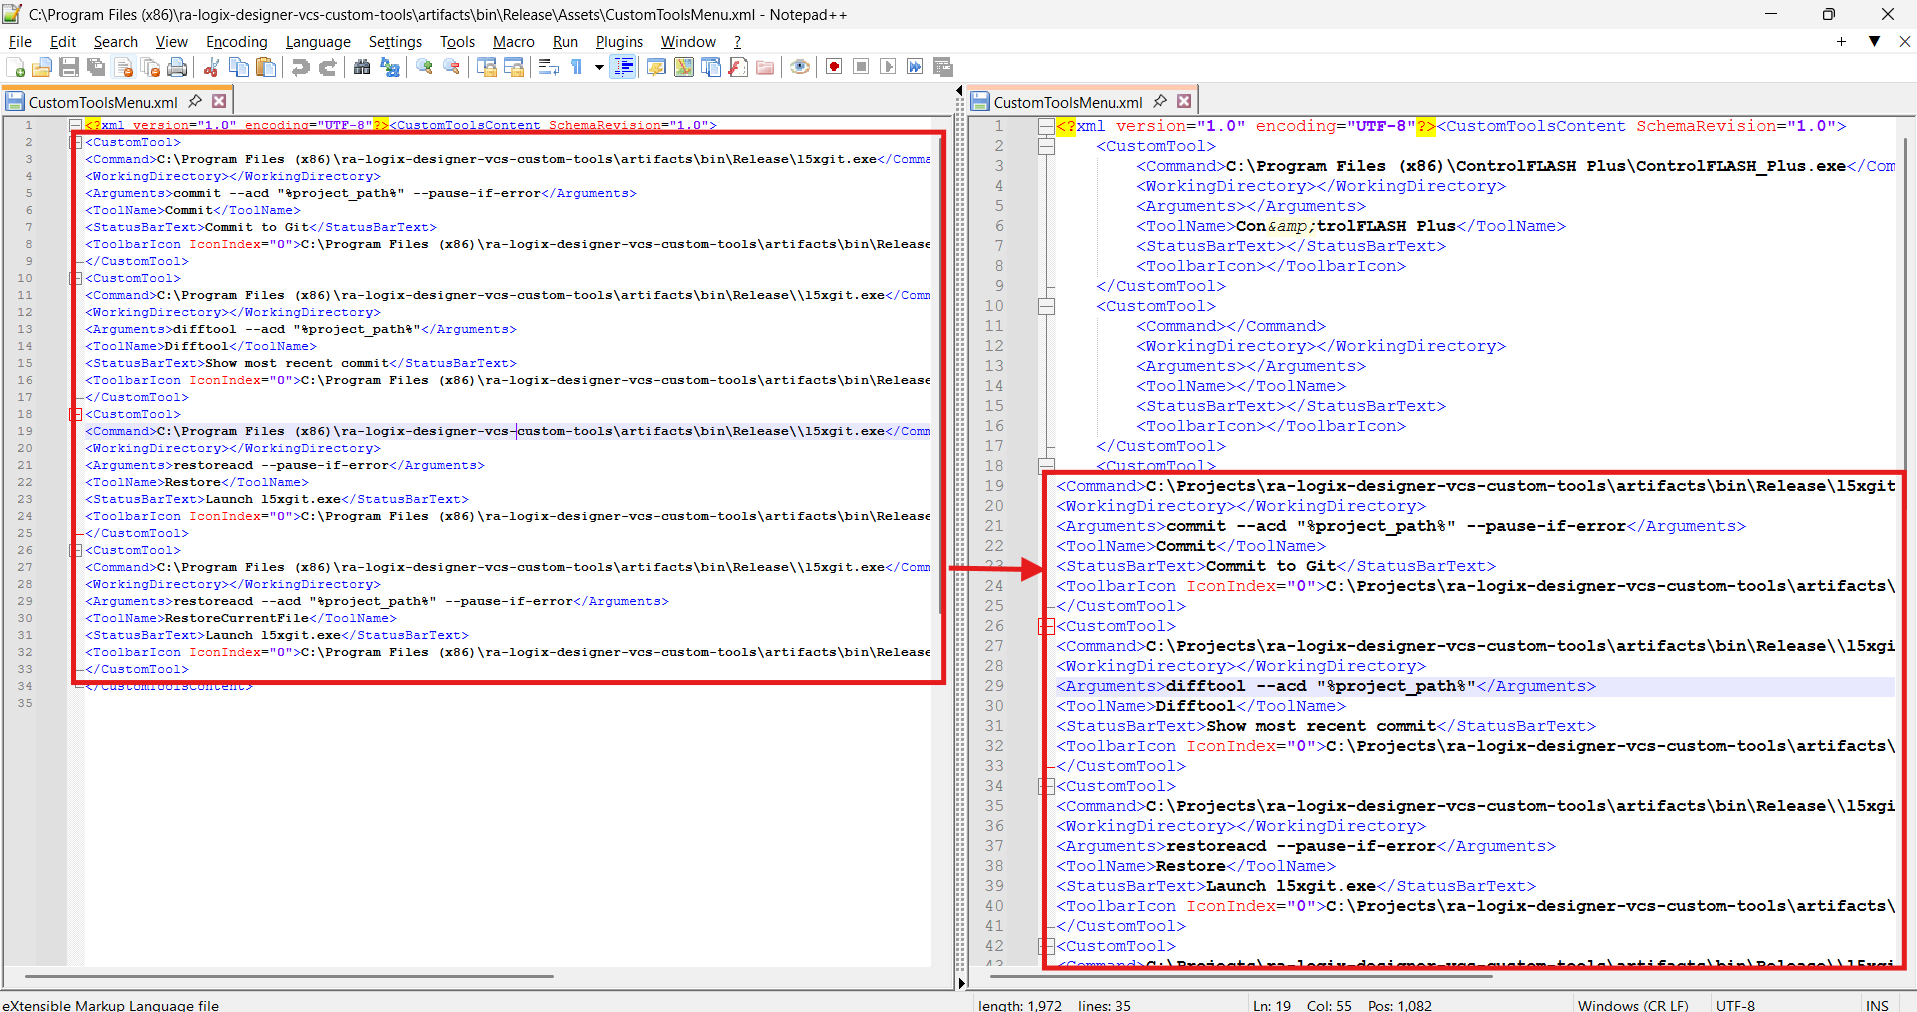
If you're not a big fan of working in a Command Prompt window, you can also integrate the Custom VCS Tools into Studio 5000 Logix Designer's user interface by adding them to the Custom Tools menu.
To do that, you can copy the contents of
artifacts\bin\release\Assets\CustomToolsMenu.xmlto
C:\Program Files (x86)\Rockwell Software\RSLogix 5000\Common\CustomToolsMenu.xmlThe end result should look something like this:
After restarting Studio 5000 Logix Designer, the VCS Custom Tools should be available in the Tools menu.
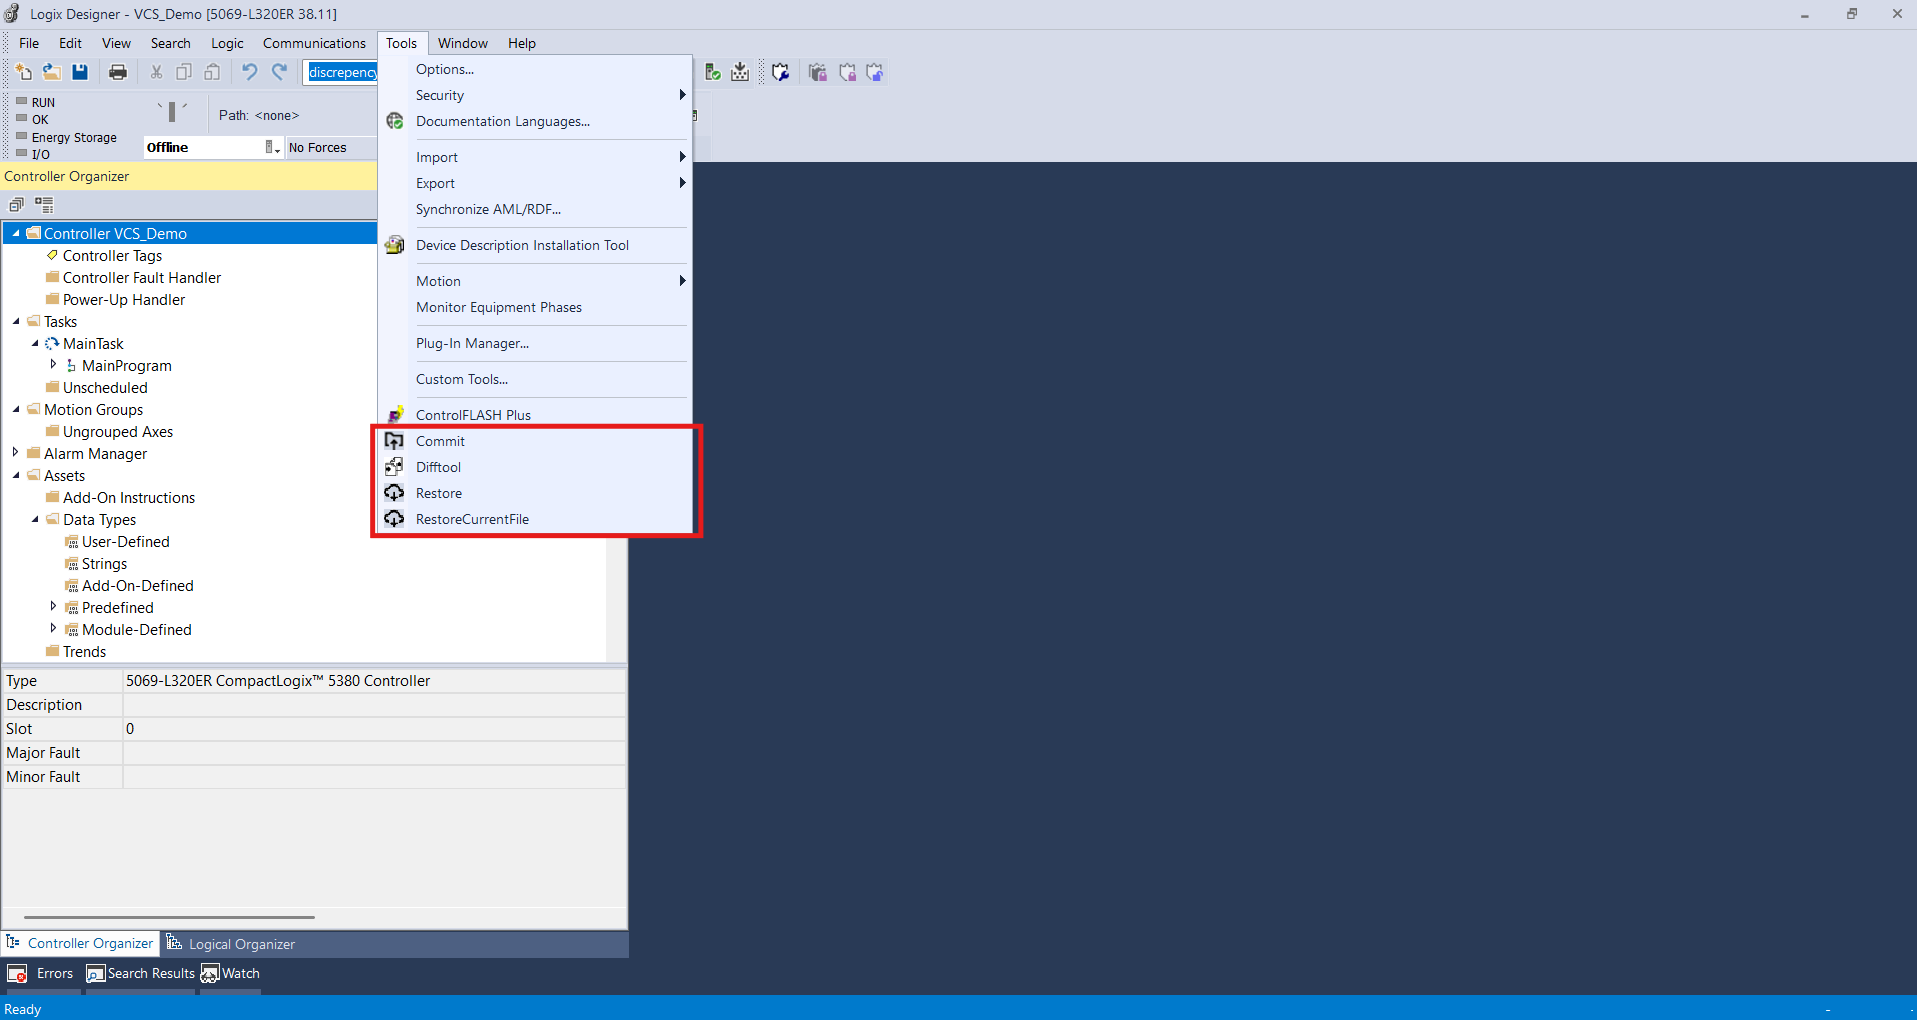
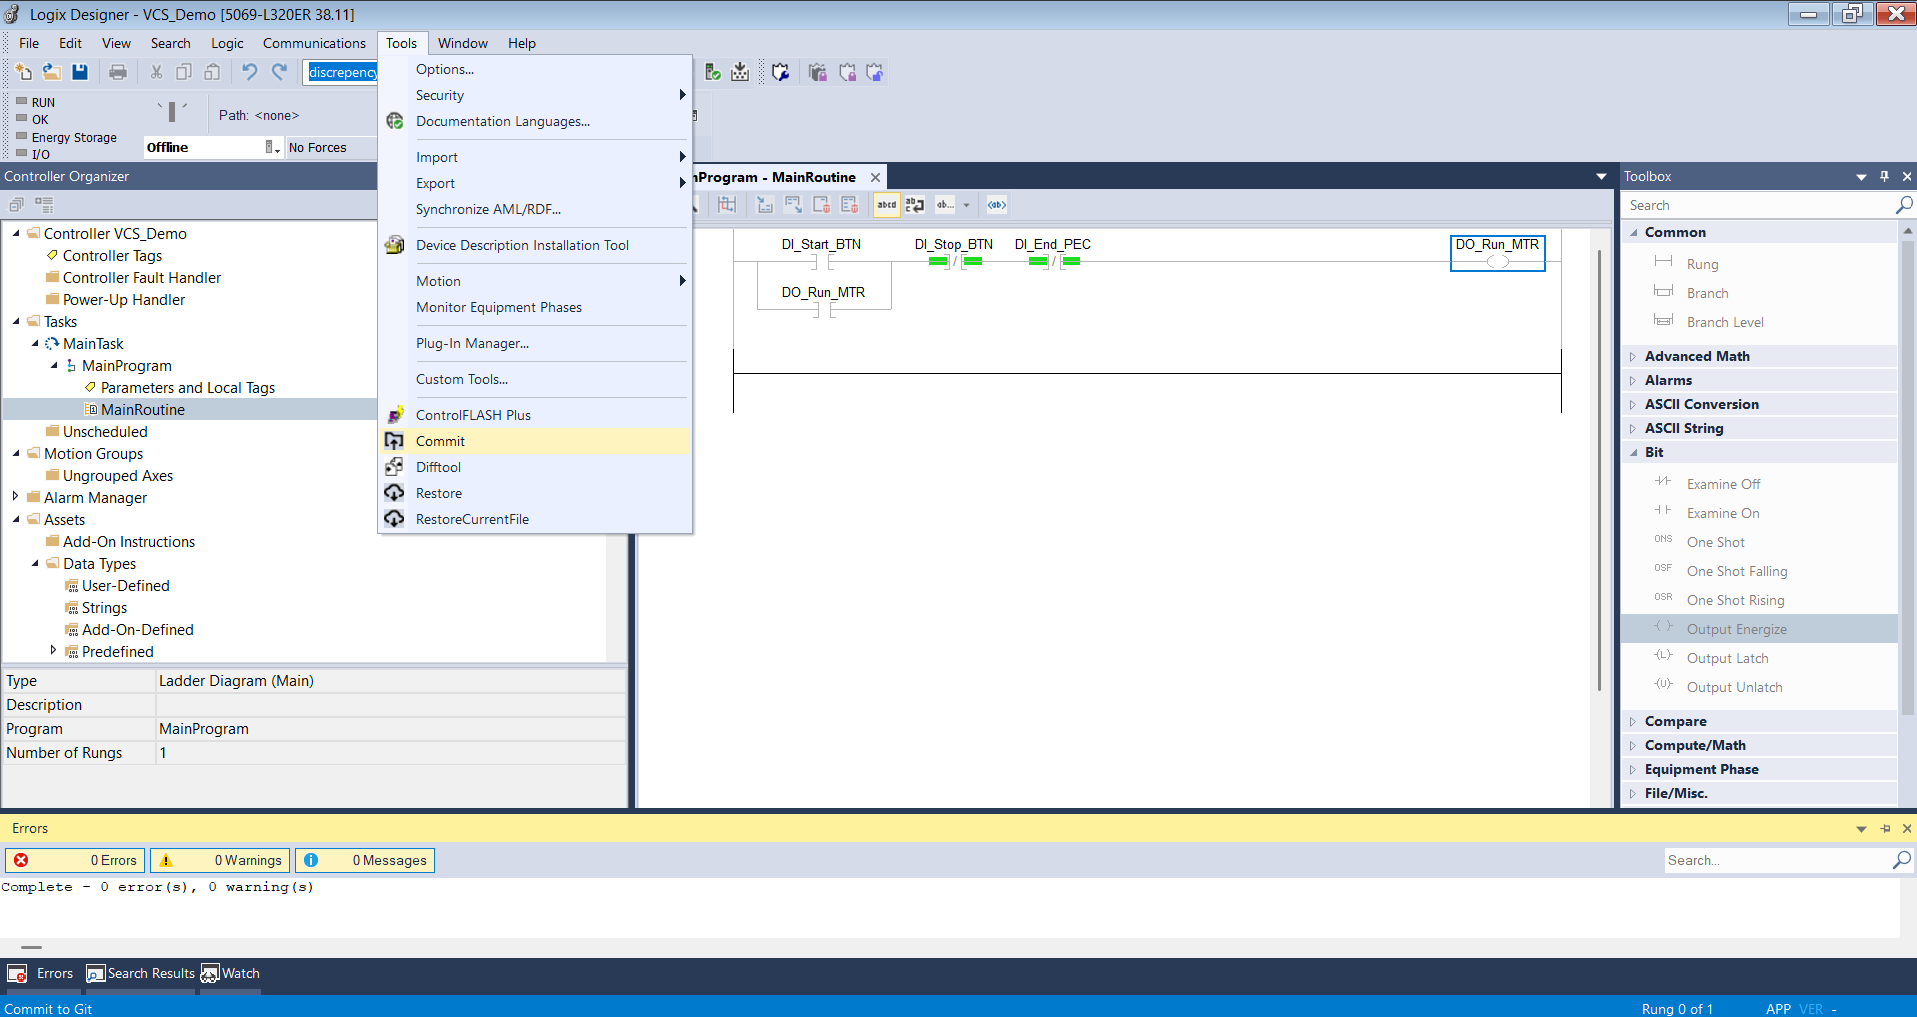
Now, I can make changes to the project, save the project, and commit the changes to the local repository from the UI.
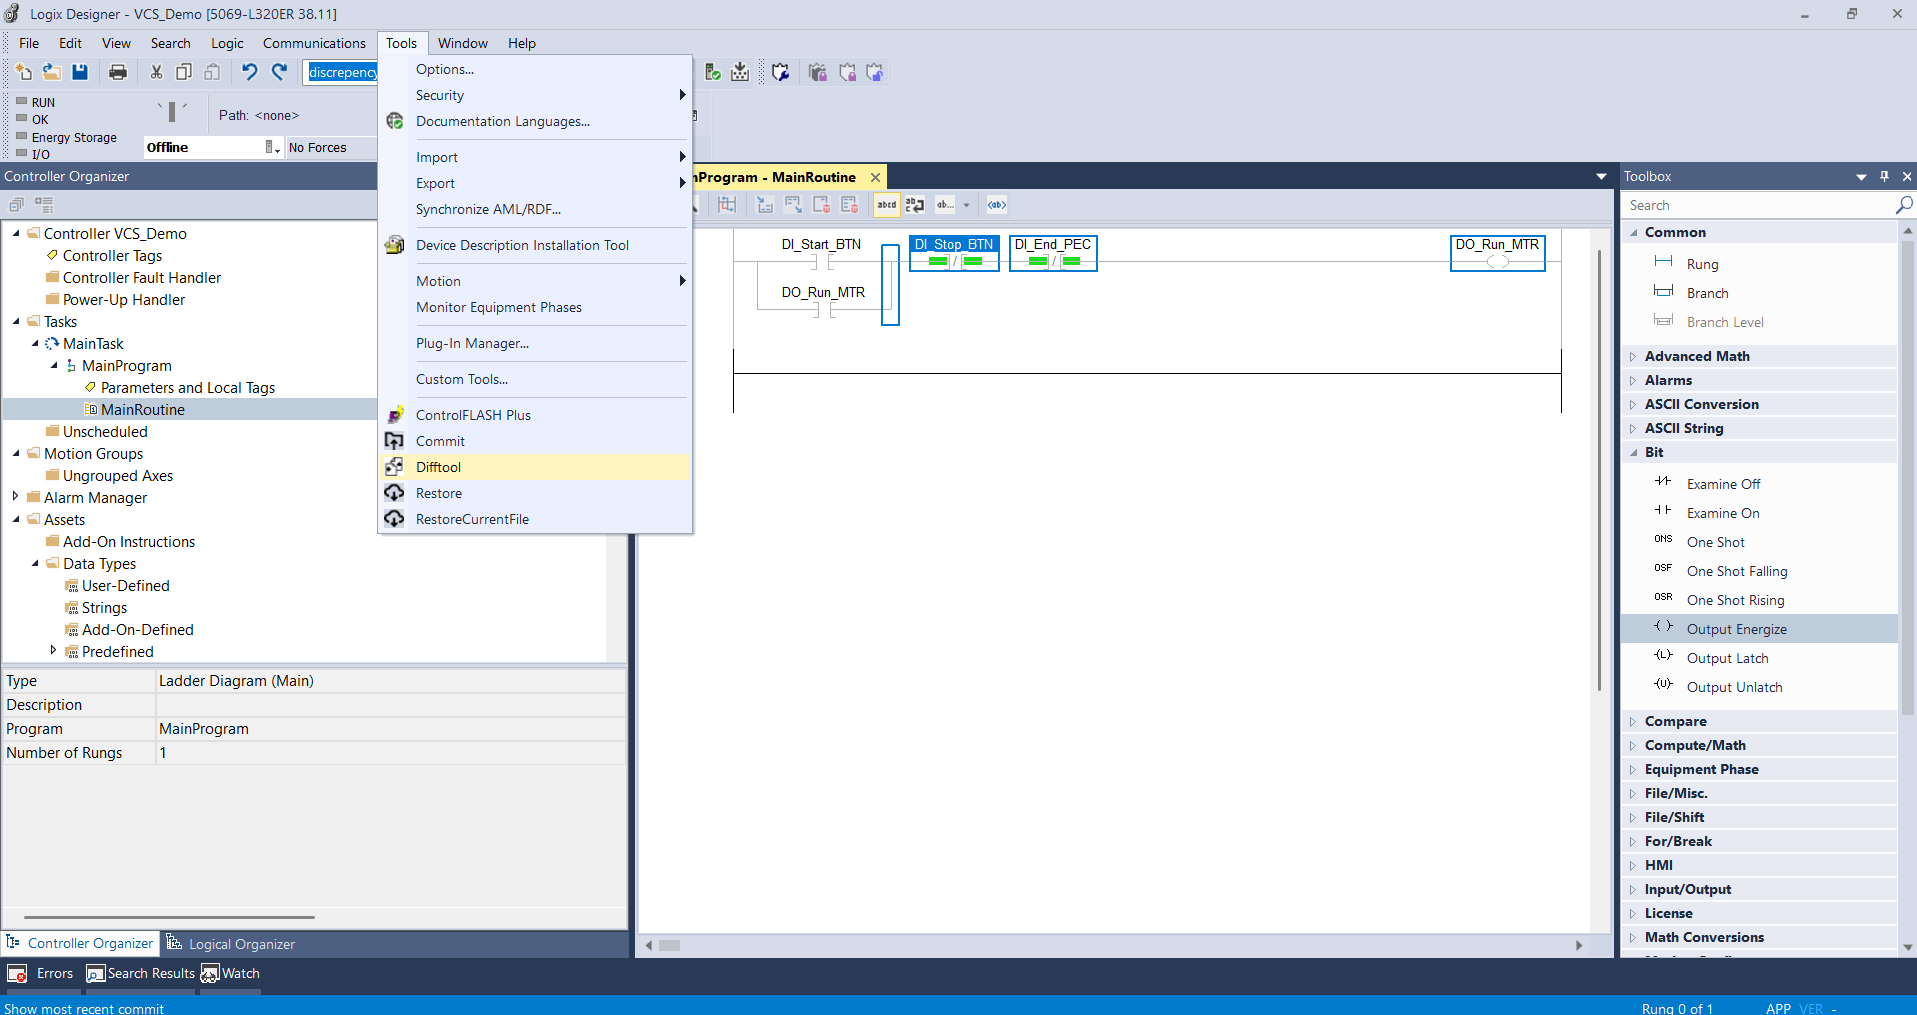
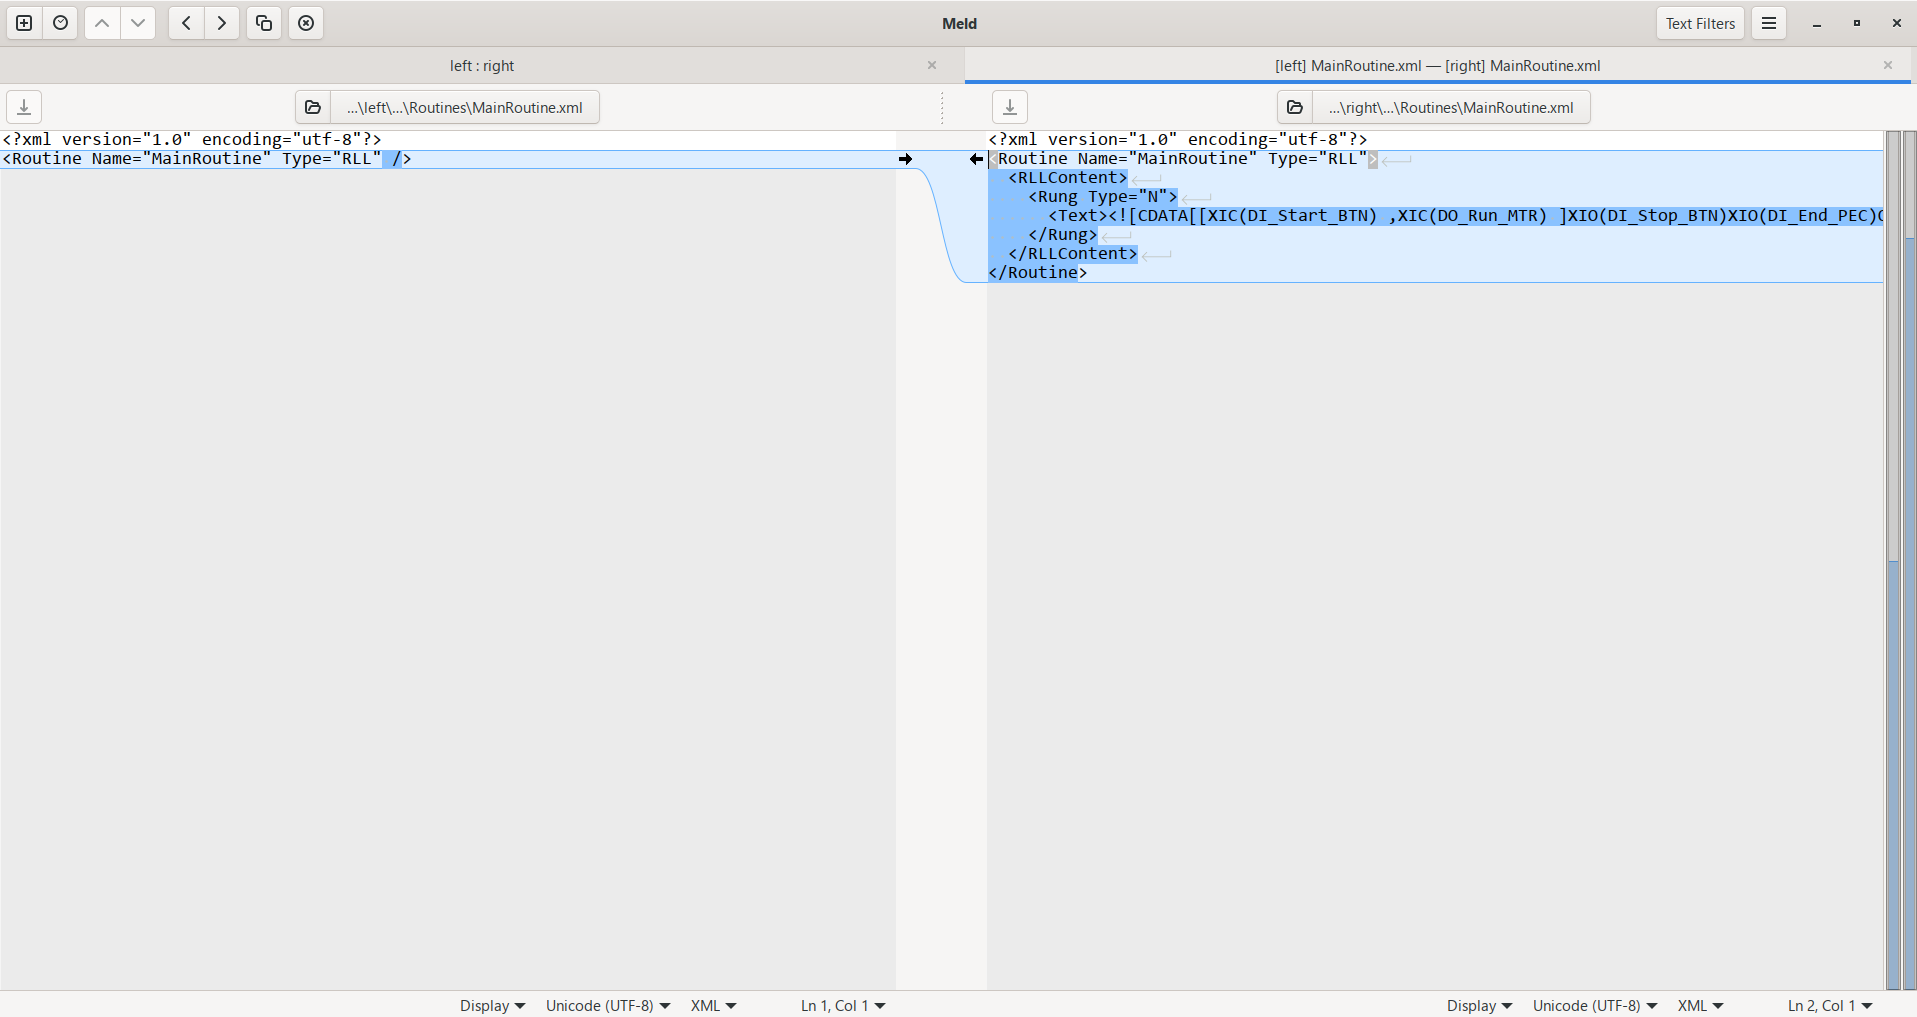
I can also use the Difftool command to see the difference between the local and the remote repository. Since I have just made a commit to the local repository, I can run the Difftool and see a difference:
Finally, I can use the Restore or RestoreCurrentFile commands to restore the project from the local repository to roll back unwanted changes.
Wrap Up
Now you know how to use Git and GitHub with Studio 5000 Logix Designer to implement a robust, reliable, and free version control system.
This is obviously not a replacement for tools like AssetCentre that are used by end users, but is a great option for OEMs and System Integrators who want to keep track of software that is being actively developed for a project.
Learn PLC Programming in your browser
Learn PLC programming by building projects in your browser - no hardware or software required.
Then €29.97/month · Cancel any time